Setting up a supplier file
This chapter explains how to set up a supplier record once it has been created. Various information must be entered to manage transactions with the supplier.
To create a supplier record, refer to the “Create a customer” guide. If this guide takes the example of creating a customer master record, the process remains the same for creating a supplier master record.
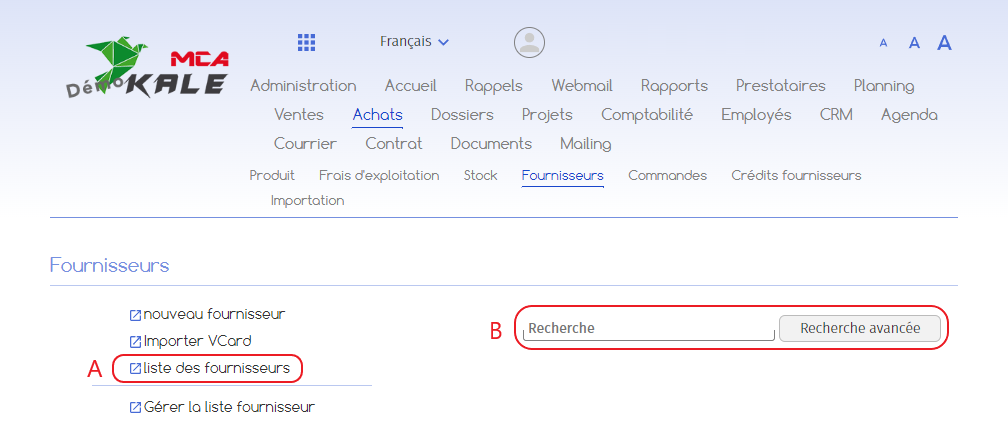
1. Setting up a supplier file
Go to the “Purchasing” menu, then “Suppliers”, and select the supplier file you wish to configure by going through the list of suppliers. (A) or the search bar (B).
1.1. VAT and other payment parameters
Once on the form, click on ‘Modify’ to enter new data.
Then go to the “Default values” tab at the bottom of the page.
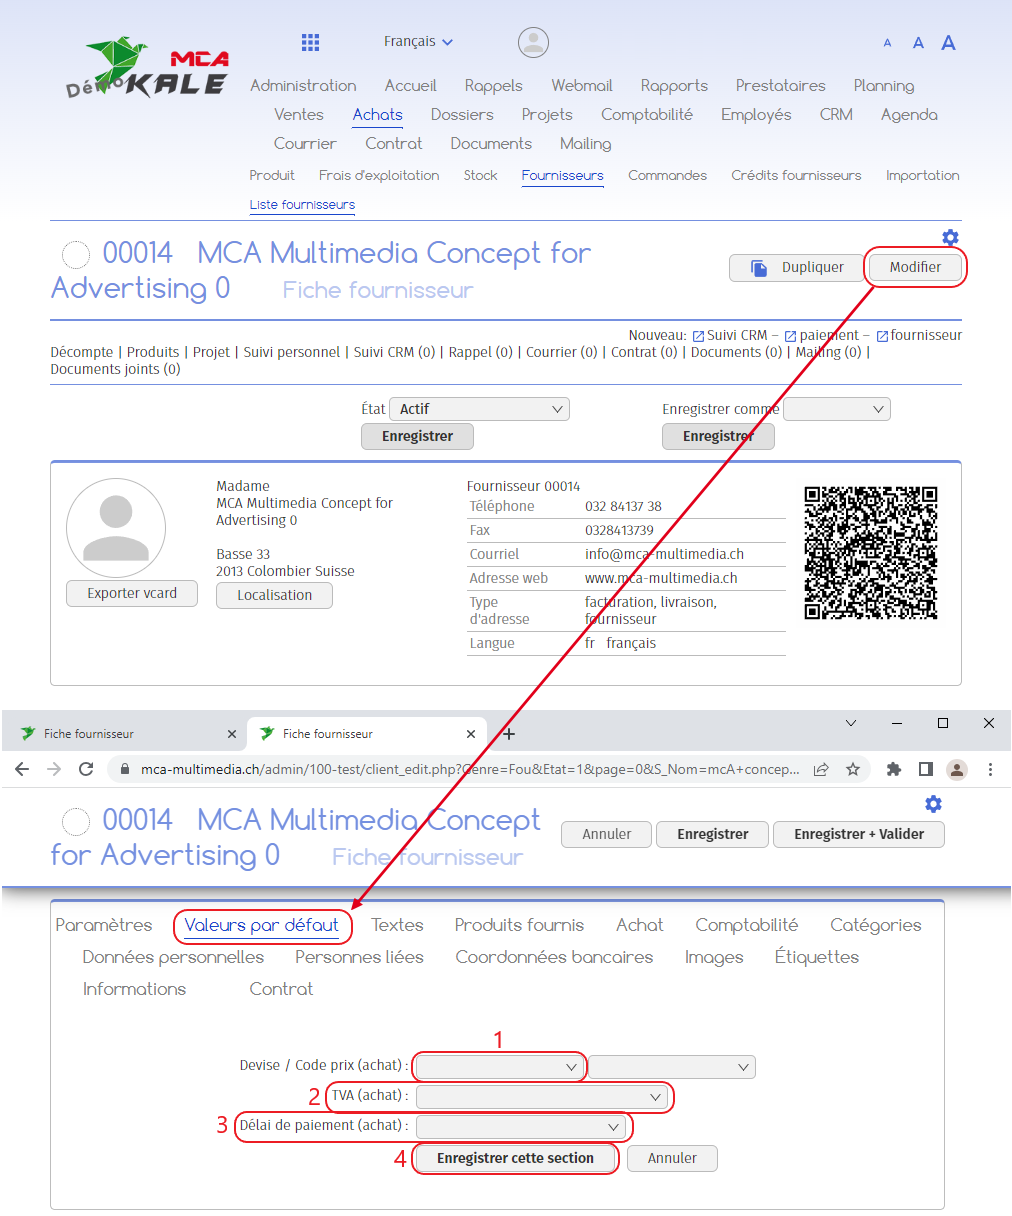
Below you’ll find explanations for each numbered red frame in this image.
In this tab :
1. Choose your payment currency ;
2. Choose the VAT rate. If the supplier is not subject to VAT, leave the field blank;
3. Specify the payment period for purchases. This parameter is used to take into account any agreement made with the supplier in terms of payment terms. For example, the supplier will offer you a 2% discount on the total amount of the invoice if it is paid within 10 days. You can therefore set a payment period of 10 days with this supplier;
4. Click on “Save this section”.
1.2. Accounting
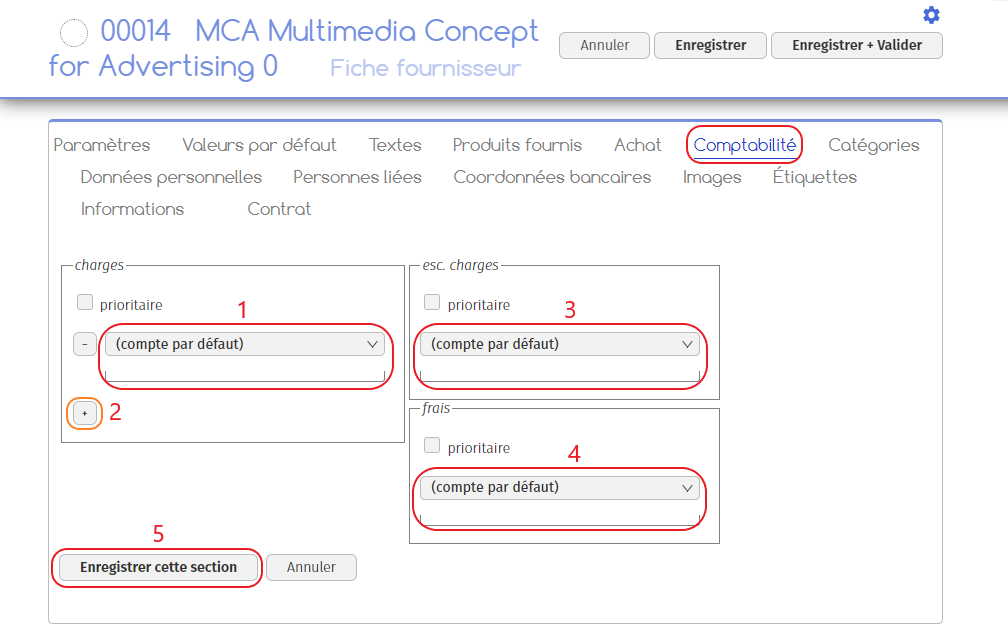
1. Select the supplier’s default expense account;
2. It is possible to add several accounts to a supplier if the latter offers products or services that do not correspond to the same expense account. Click on the “+” button to add another account;
3. Select the discount account. This account allows you to keep track of any discounts you may have obtained on your purchases. You may choose to allocate the same account for expenses and discounts, since expenses are booked on the debit side and discounts on the credit side;
4. Choose the expense account. This can be used to record transport costs, bank charges, etc.
5. Click on the “Save this section” button.
1.3. Bank details
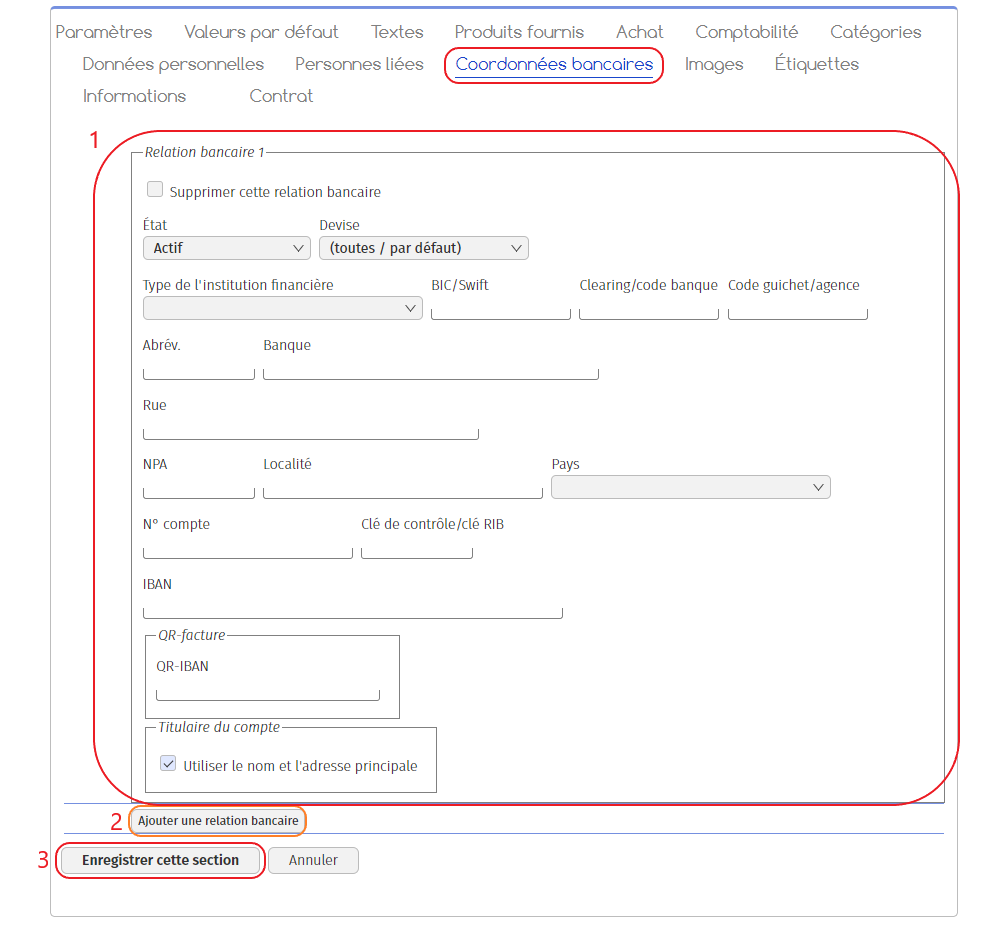
1. Enter the supplier’s bank details ;
2. Optional: You can add additional banking relationships if the supplier has several accounts;
3. Click on “Save this section”.
Note
This setting is valid for payments without a QR code. If you pay a QR invoice, the information on the QR code is decisive.
2. Confirm changes
Your supplier file now contains all the important information. If you wish, you can add further information in the other available tabs.
When you have finished, click on “Save + Validate” at the top of the page.
