Create a supplier purchase order
This guide takes you step-by-step through the creation of a supplier purchase order.
1. Create an order form
When you create a quotation for a customer, you may not have the merchandise in stock. You need to order it. For products whose price has already been set by your supplier, you can create a purchase order directly, without having to go through a call for tenders.
Practical note: the purchase order must first be created before the product(s) contained in the quotation can be added to it.
If the price has not been determined, you need to issue a call for tenders, known in the software as a supplier quote. To create a supplier quote, please refer to the “Creating a supplier quote (invitation to tender)” guide.
1.1. Step 1: Open order form
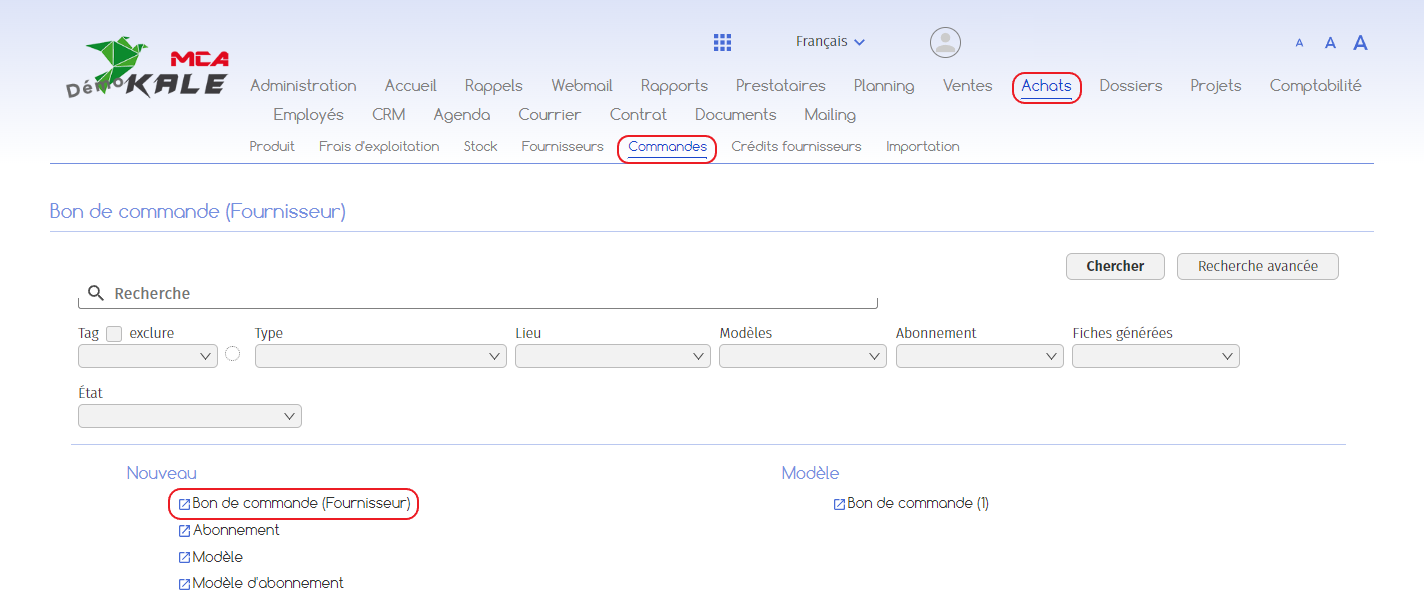
To create a purchase order, go to the “Purchasing” menu, then “Orders”. In the “New” section, click on “Purchase order (Supplier)”.
Watch out! Unlike customer purchase orders, which are created in the “Sales” menu, supplier purchase orders are created in the “Purchasing” menu.
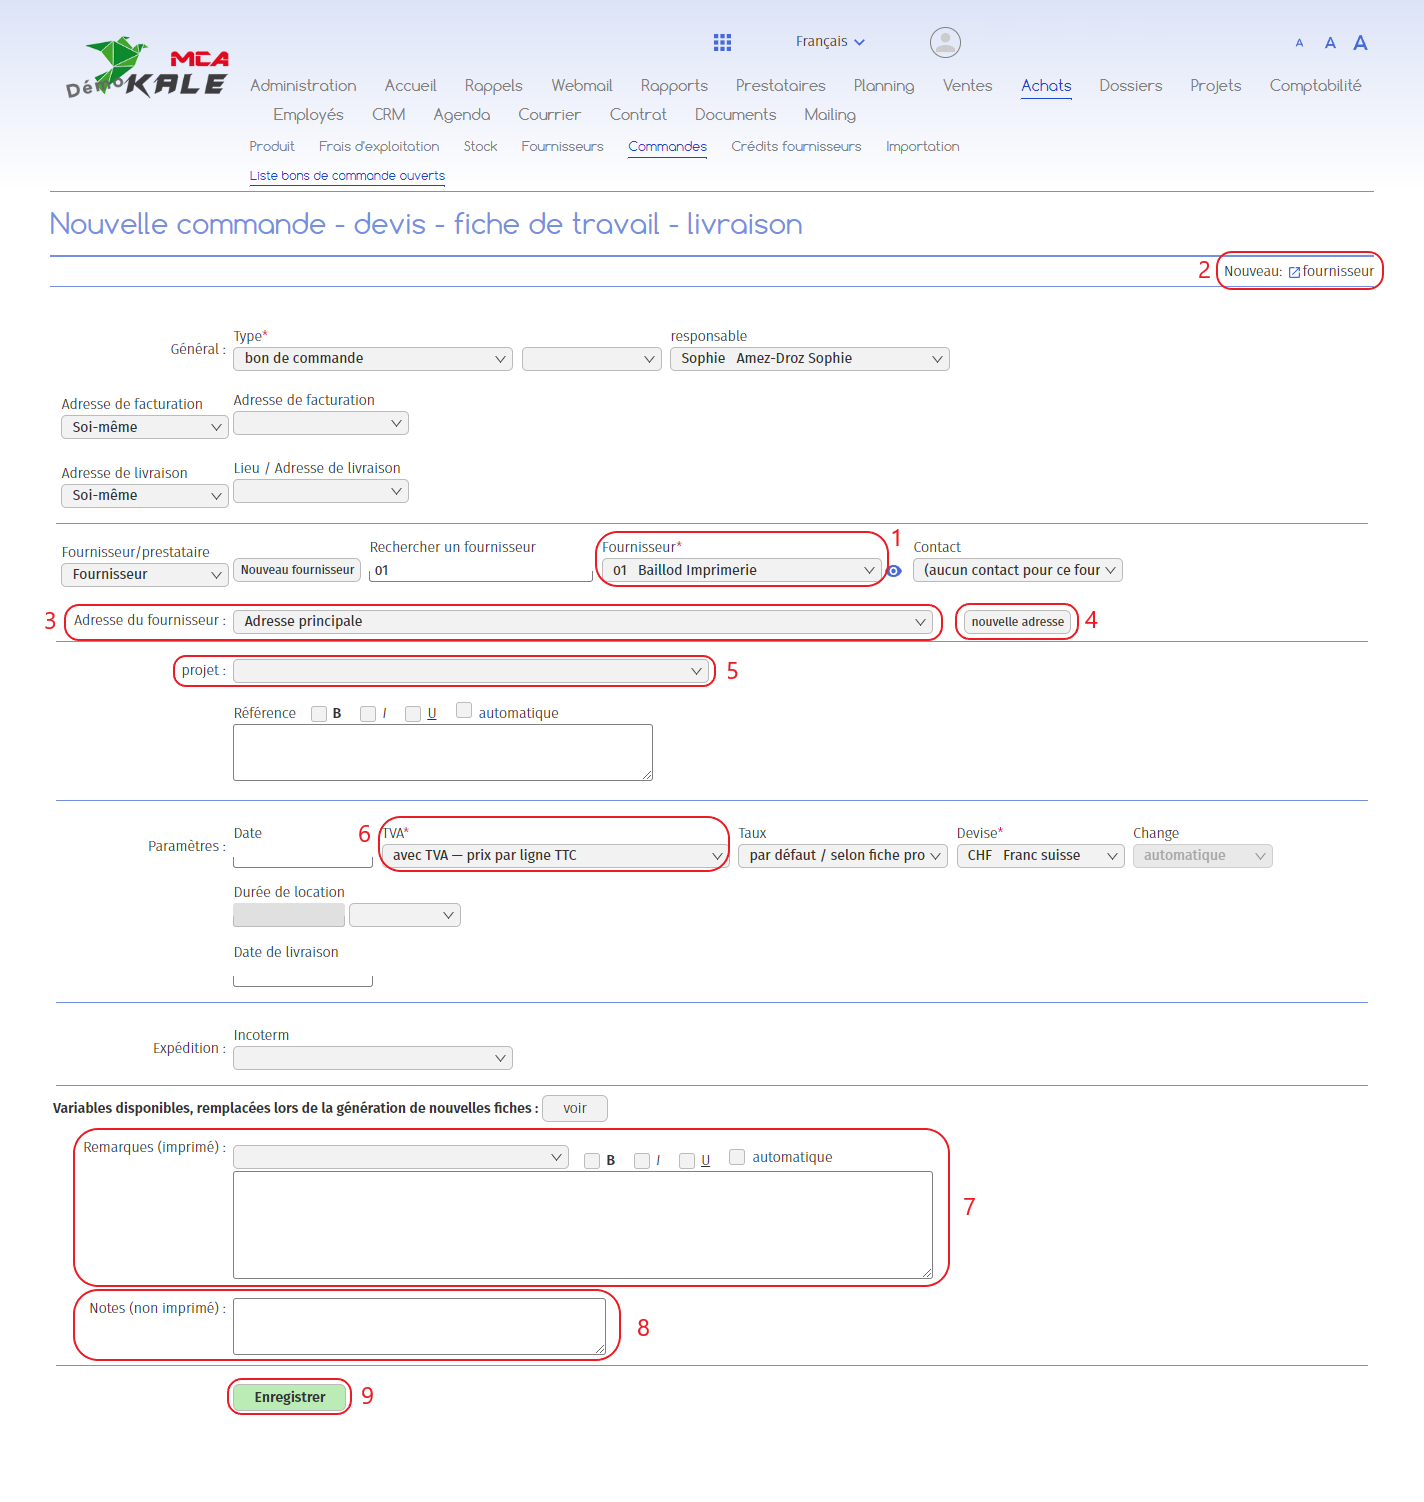
Below are the numbered explanations for each red frame in this image.
1. Select the supplier from the existing suppliers in the database using the “Supplier” drop-down menu;
2. If the supplier does not appear in the drop-down menu, you can create a new supplier record by clicking on the “New: Supplier” link at the top right of the page. Then fill in the details of the new supplier and click on “Add”;
3. Select the supplier’s address;
2. If the customer does not appear in the drop-down menu, you can create a new customer record by clicking on the “New: customer” link at the top right of the page.
5. You can link the voucher to a project by selecting the project from the “project” drop-down menu;
6. Specify whether the purchase order includes VAT or not. If yes, also select the associated rate;
7. This section allows you to add a text that will be visible on the voucher. You can select a predefined text template from the drop-down menu ;
8. This section allows you to add text that will not be visible on the voucher;
9. To save the information you have just added and move on to the next step, click on “Save”. To cancel the creation of the voucher, close the page before saving.

1.1.1. Adding products from the customer quote
The software lets you create a purchase order from a customer quotation at the “to be delivered/executed” or “in progress” stage.
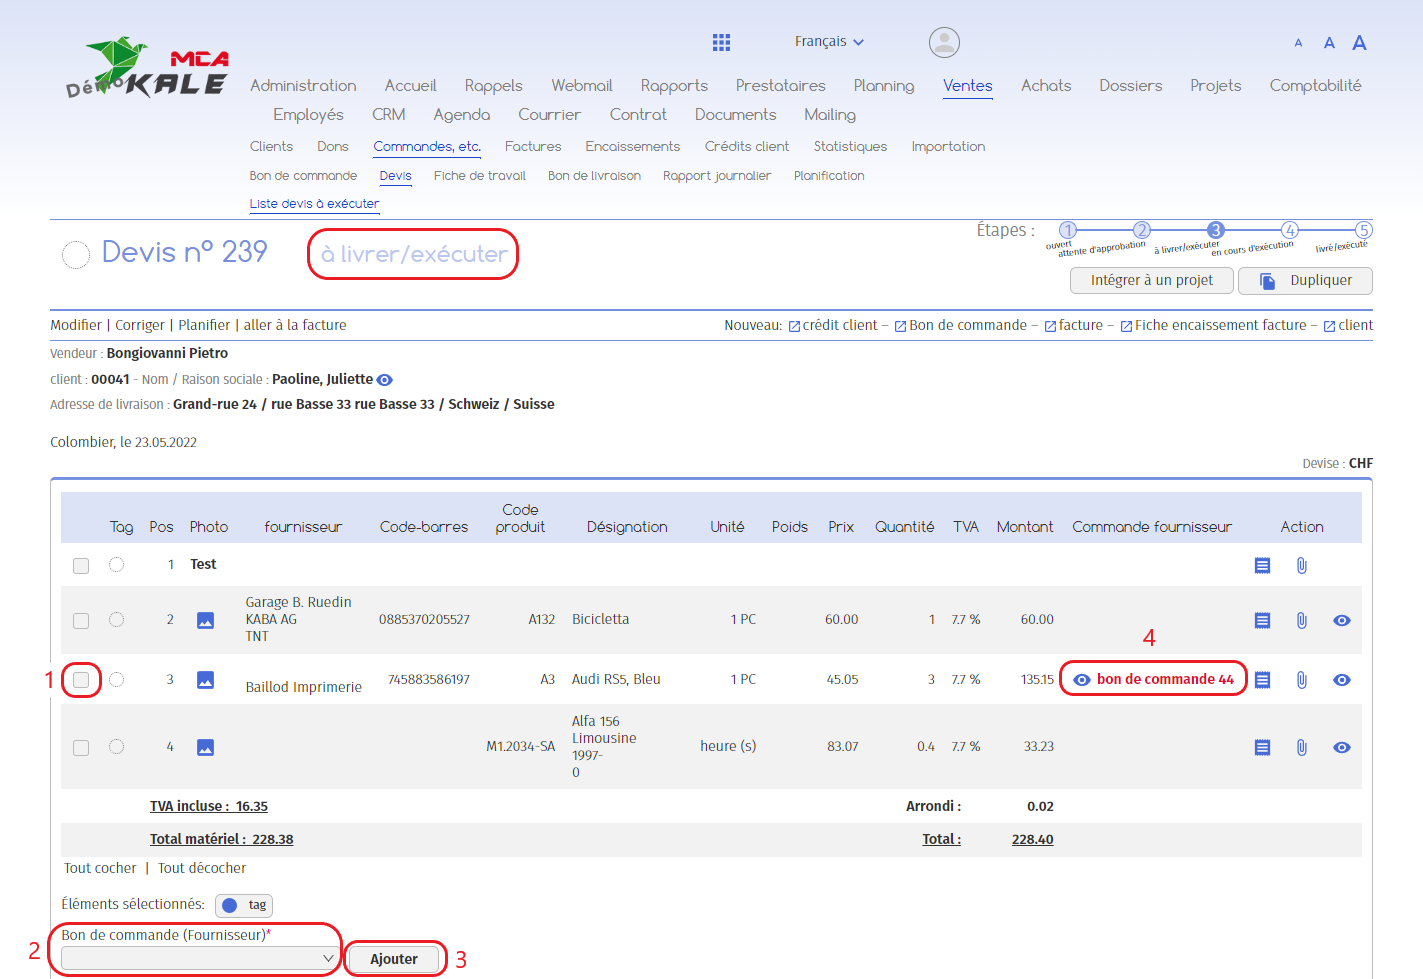
In the relevant quotation :
1. Check the box(es) of the product(s) you wish to add to a purchase order;
2. Select the purchase order number ;
3. Click on “Add”;
4. The product(s) has/have been added to purchase order n°3. To access the order form, click on the “eye” icon.
1.1.2. Validation
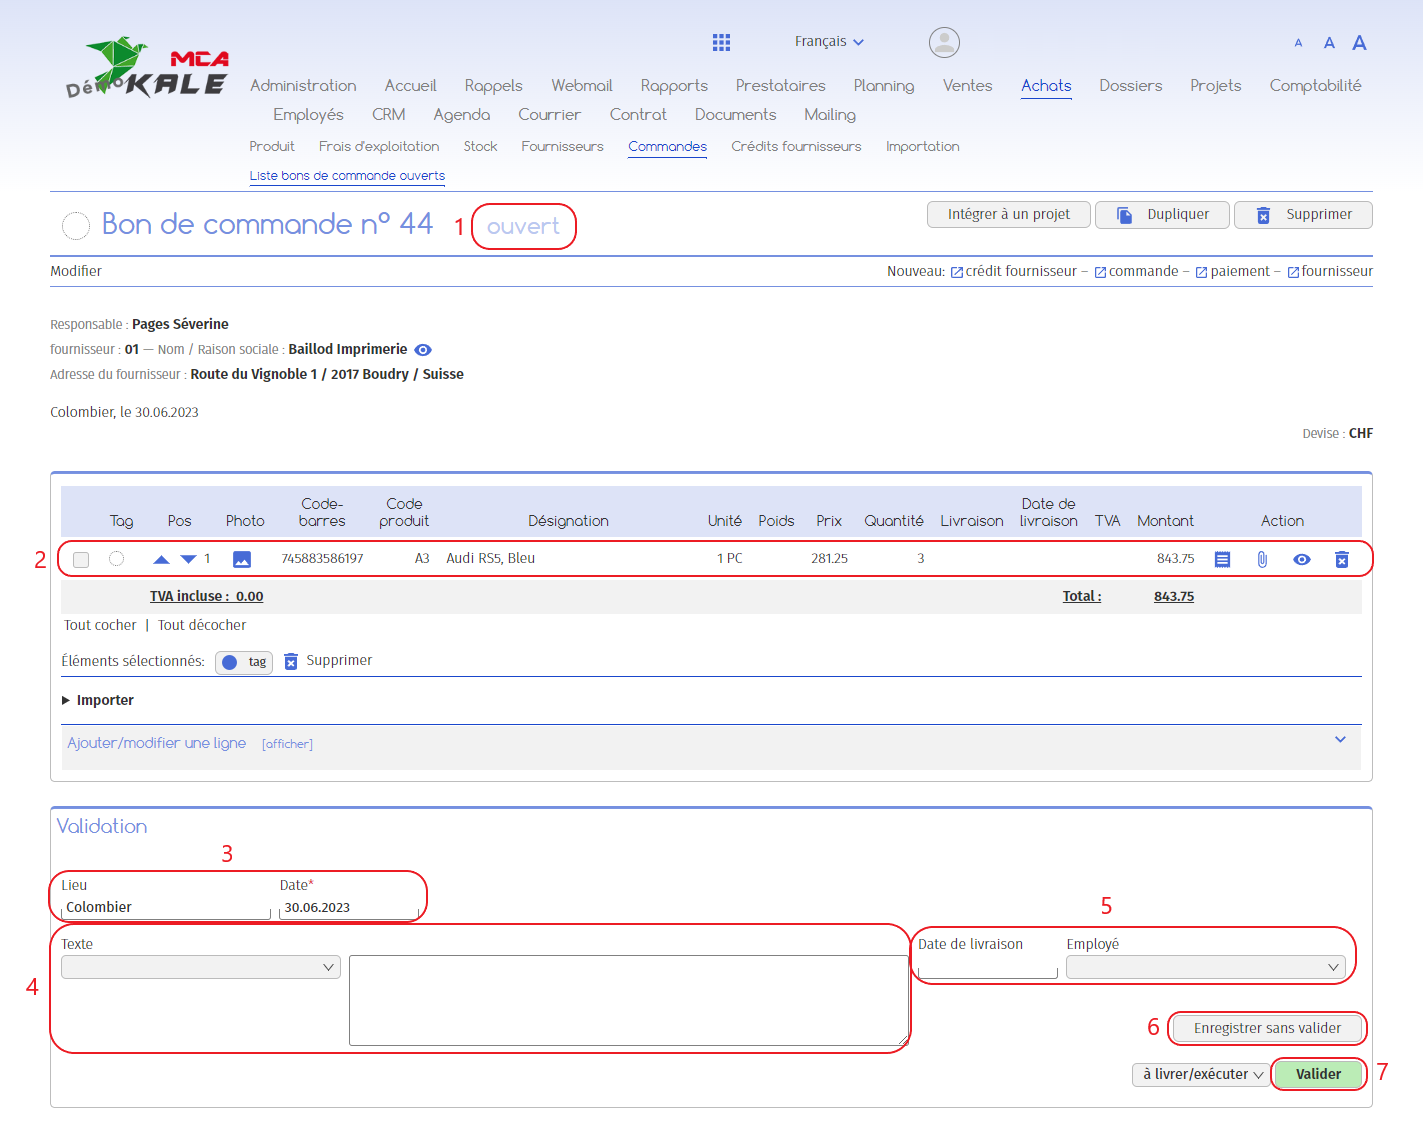
1. Your order form is “open”;
2. Here you will find the product(s) added in the previous step;
3. To validate the voucher, add a location and a date;
4. If required, select a pre-recorded greeting phrase or manually add text in the box ;
5. You can specify the delivery date of the order and the employee in charge of receiving it;
6. The “Save without validating” button allows you to save the information entered in the form without validating the purchase order;
7. Click on “Validate” to validate the voucher: it will then change status from “open” to “to be delivered/executed”.
1.2. Step 2: Purchase order to be delivered/executed
When your purchase order is to be delivered/executed, the software offers you 2 possibilities:
- – Print the voucher and mail it to your customer
– Send an e-mail to your customer, attaching the PDF voucher
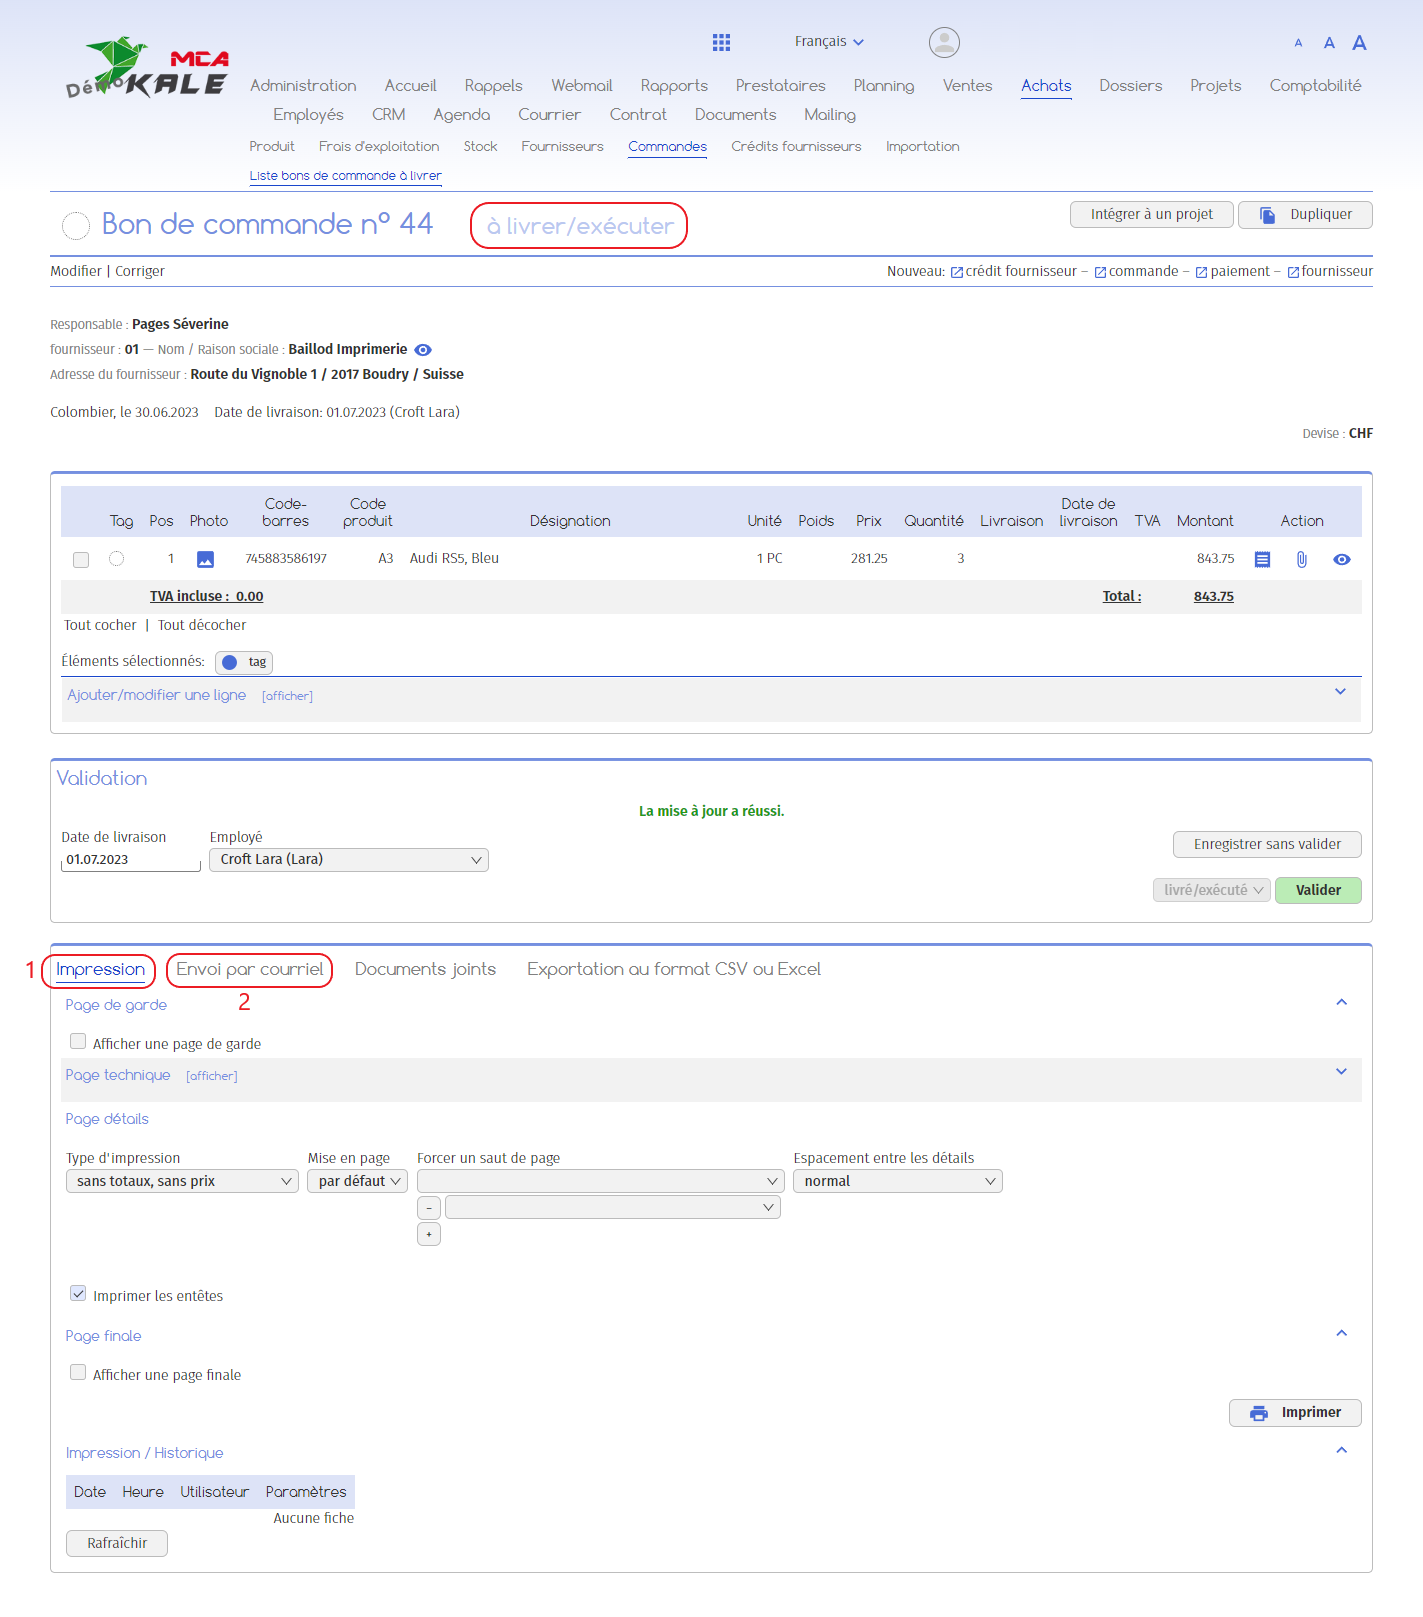
1. You can print the voucher or download it as a PDF by selecting the print settings and clicking on “Print”;
2. You can send the voucher by e-mail by going to the “Send by e-mail” tab. Fill in the recipients, the subject of your email and the text, and click on “Send”. The order form in PDF format will be automatically attached to the e-mail.
Finally, to move on to the next step, as soon as the goods or service have been delivered, click on “Validate” to confirm that the delivery has been made. The purchase order will change its status to “delivered/executed”.
