Make a supplier payment
1. Create a payment
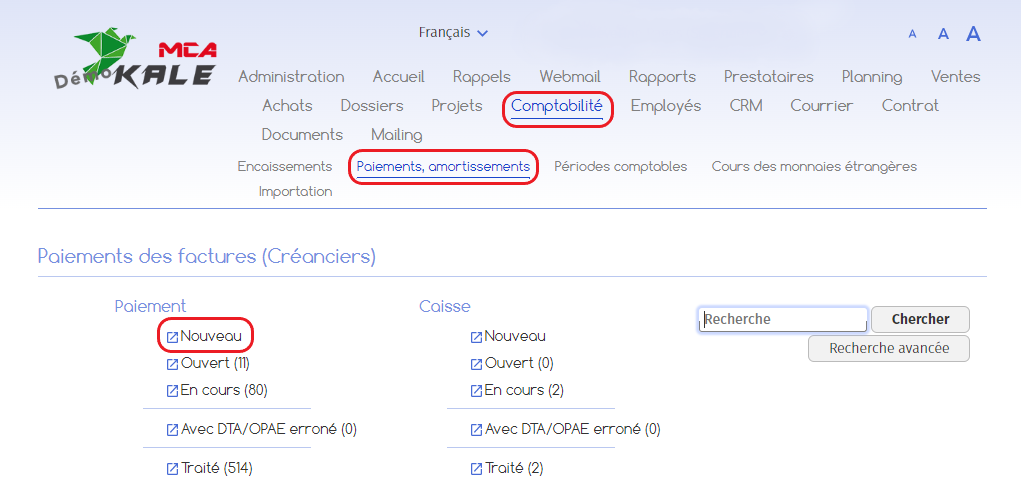
1.1. 1st step: new payment
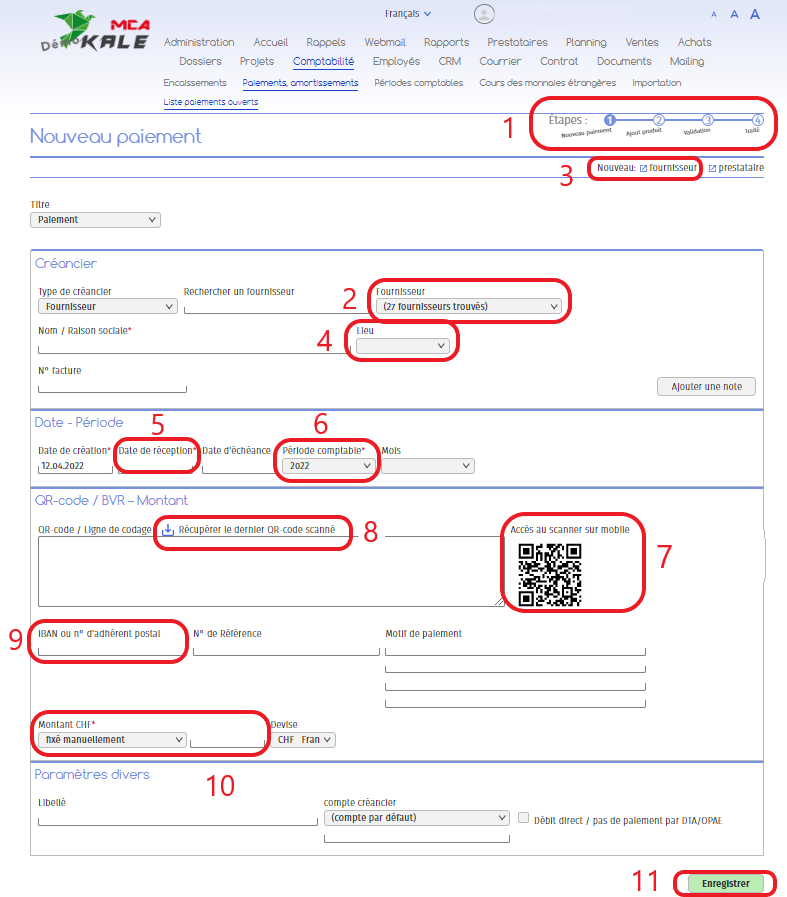
Below are the numbered explanations for each red frame in this image.
1. A diagram in the top right-hand corner shows you the steps to be taken until payment is received.
is processed, and what stage you are at in the payment creation process. Here you
are at the first step: New payment ;
2. Select the supplier from the existing suppliers in the database, using the
“Supplier” drop-down menu;
If the supplier does not appear in the drop-down menu, you can create a new supplier
record by clicking on the “New: Supplier” link at the top right of the page. Complete
then enter the details of the new supplier, and click on “Add”;
4. Add the location of your company’s branch ;
5. Fill in the date of receipt of the invoice ;
6. Complete the accounting period to which your payment relates.
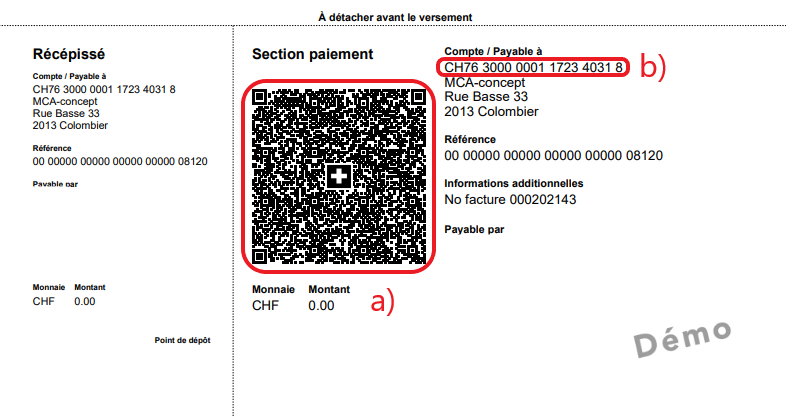
7. Scan the QR code with your cell phone’s camera.
You will be automatically redirected to Mobile QR – Code. Press “touch to start” on your cell phone, and scan the QR-code on the bill (box a);
8. Click on “Retrieve last scanned QR-code”, and the payment information will be filled in automatically.
However, if the supplier’s bank details are not registered in the supplier file, some information will not be filled in automatically. They must then be inserted manually;
9. If the supplier’s IBAN has not been added automatically, you must enter it manually (box b);
10. The “Amount” drop-down menu gives you 2 options:
• Set manually: enter your payment amount manually in the field to the right of the drop-down menu. If the QR invoice has a defined amount, this will already have been automatically retrieved in step 8 ;
• Automatically calculated: with this option, you enter products in the second payment stage, and the software automatically calculates the amount based on the price of each product. This method is especially useful for stock management, as the addition of product sheets allows you to take stock movements into account;
11. Click on “Save” to proceed to step 2.
1.2. 2nd step: add product
At this stage, you can choose between adding products or simply validating the set amount. As mentioned in the previous step, the management of the payment amount via product addition exists to keep track of product stock. Go directly to the point 1.2.2. Amount with product if you choose this option, otherwise continue at point 1.2.1. Amount without product.
1.2.1. Amount without product
 | MCA Concept")
1. You are now at step 2: Add product ;
2. Your payment is now automatically assigned a number. Here, our payment is number 669 ;
As the invoice amount has already been added in the previous step, all you have to do is make the link to the accounting system.
3. If the supplier’s file has been set up correctly (see Setting up a supplier file guide), the software will automatically retrieve the debit account linked to the supplier. Otherwise, add this information manually;
4. The same applies to VAT linked to the supplier;
5. Click on “Add”.
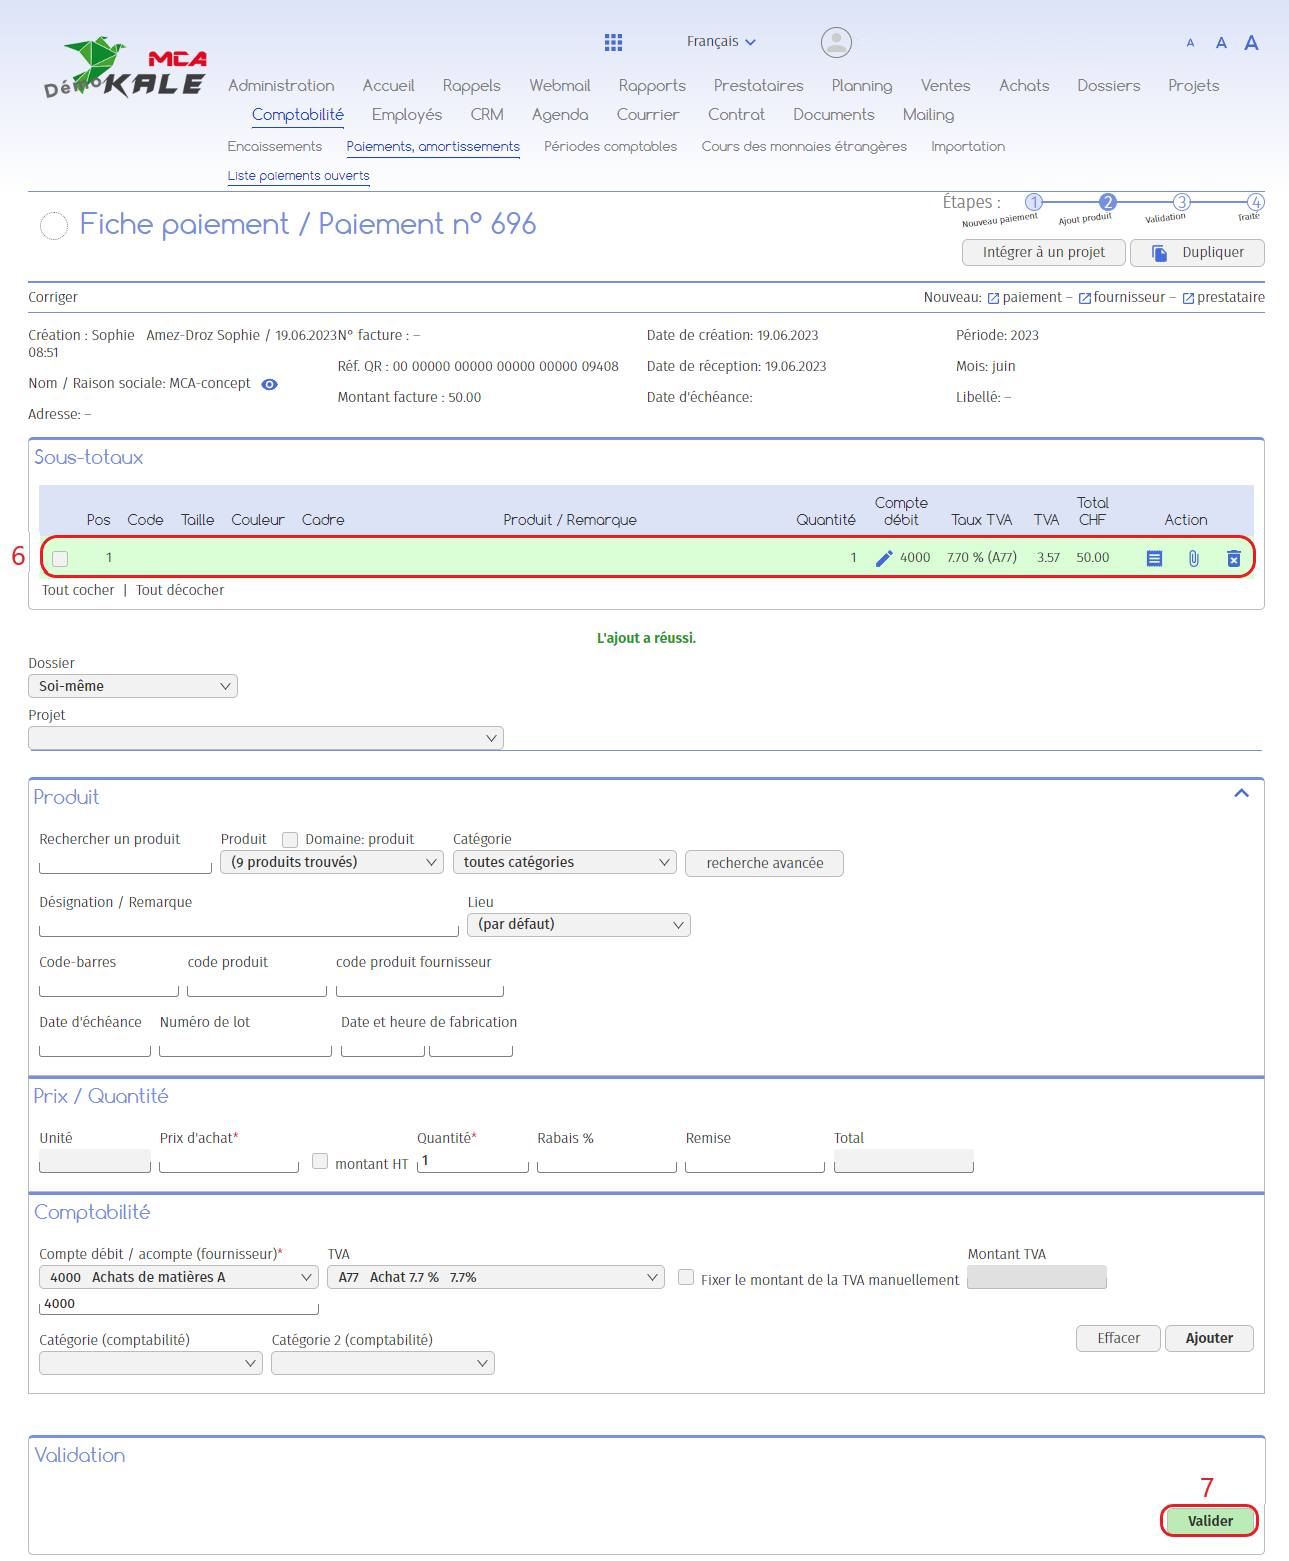
6. The amount appears here with VAT and the debit account;
7. Click on “Validate” to proceed to step 3.
1.2.2. Amount with product
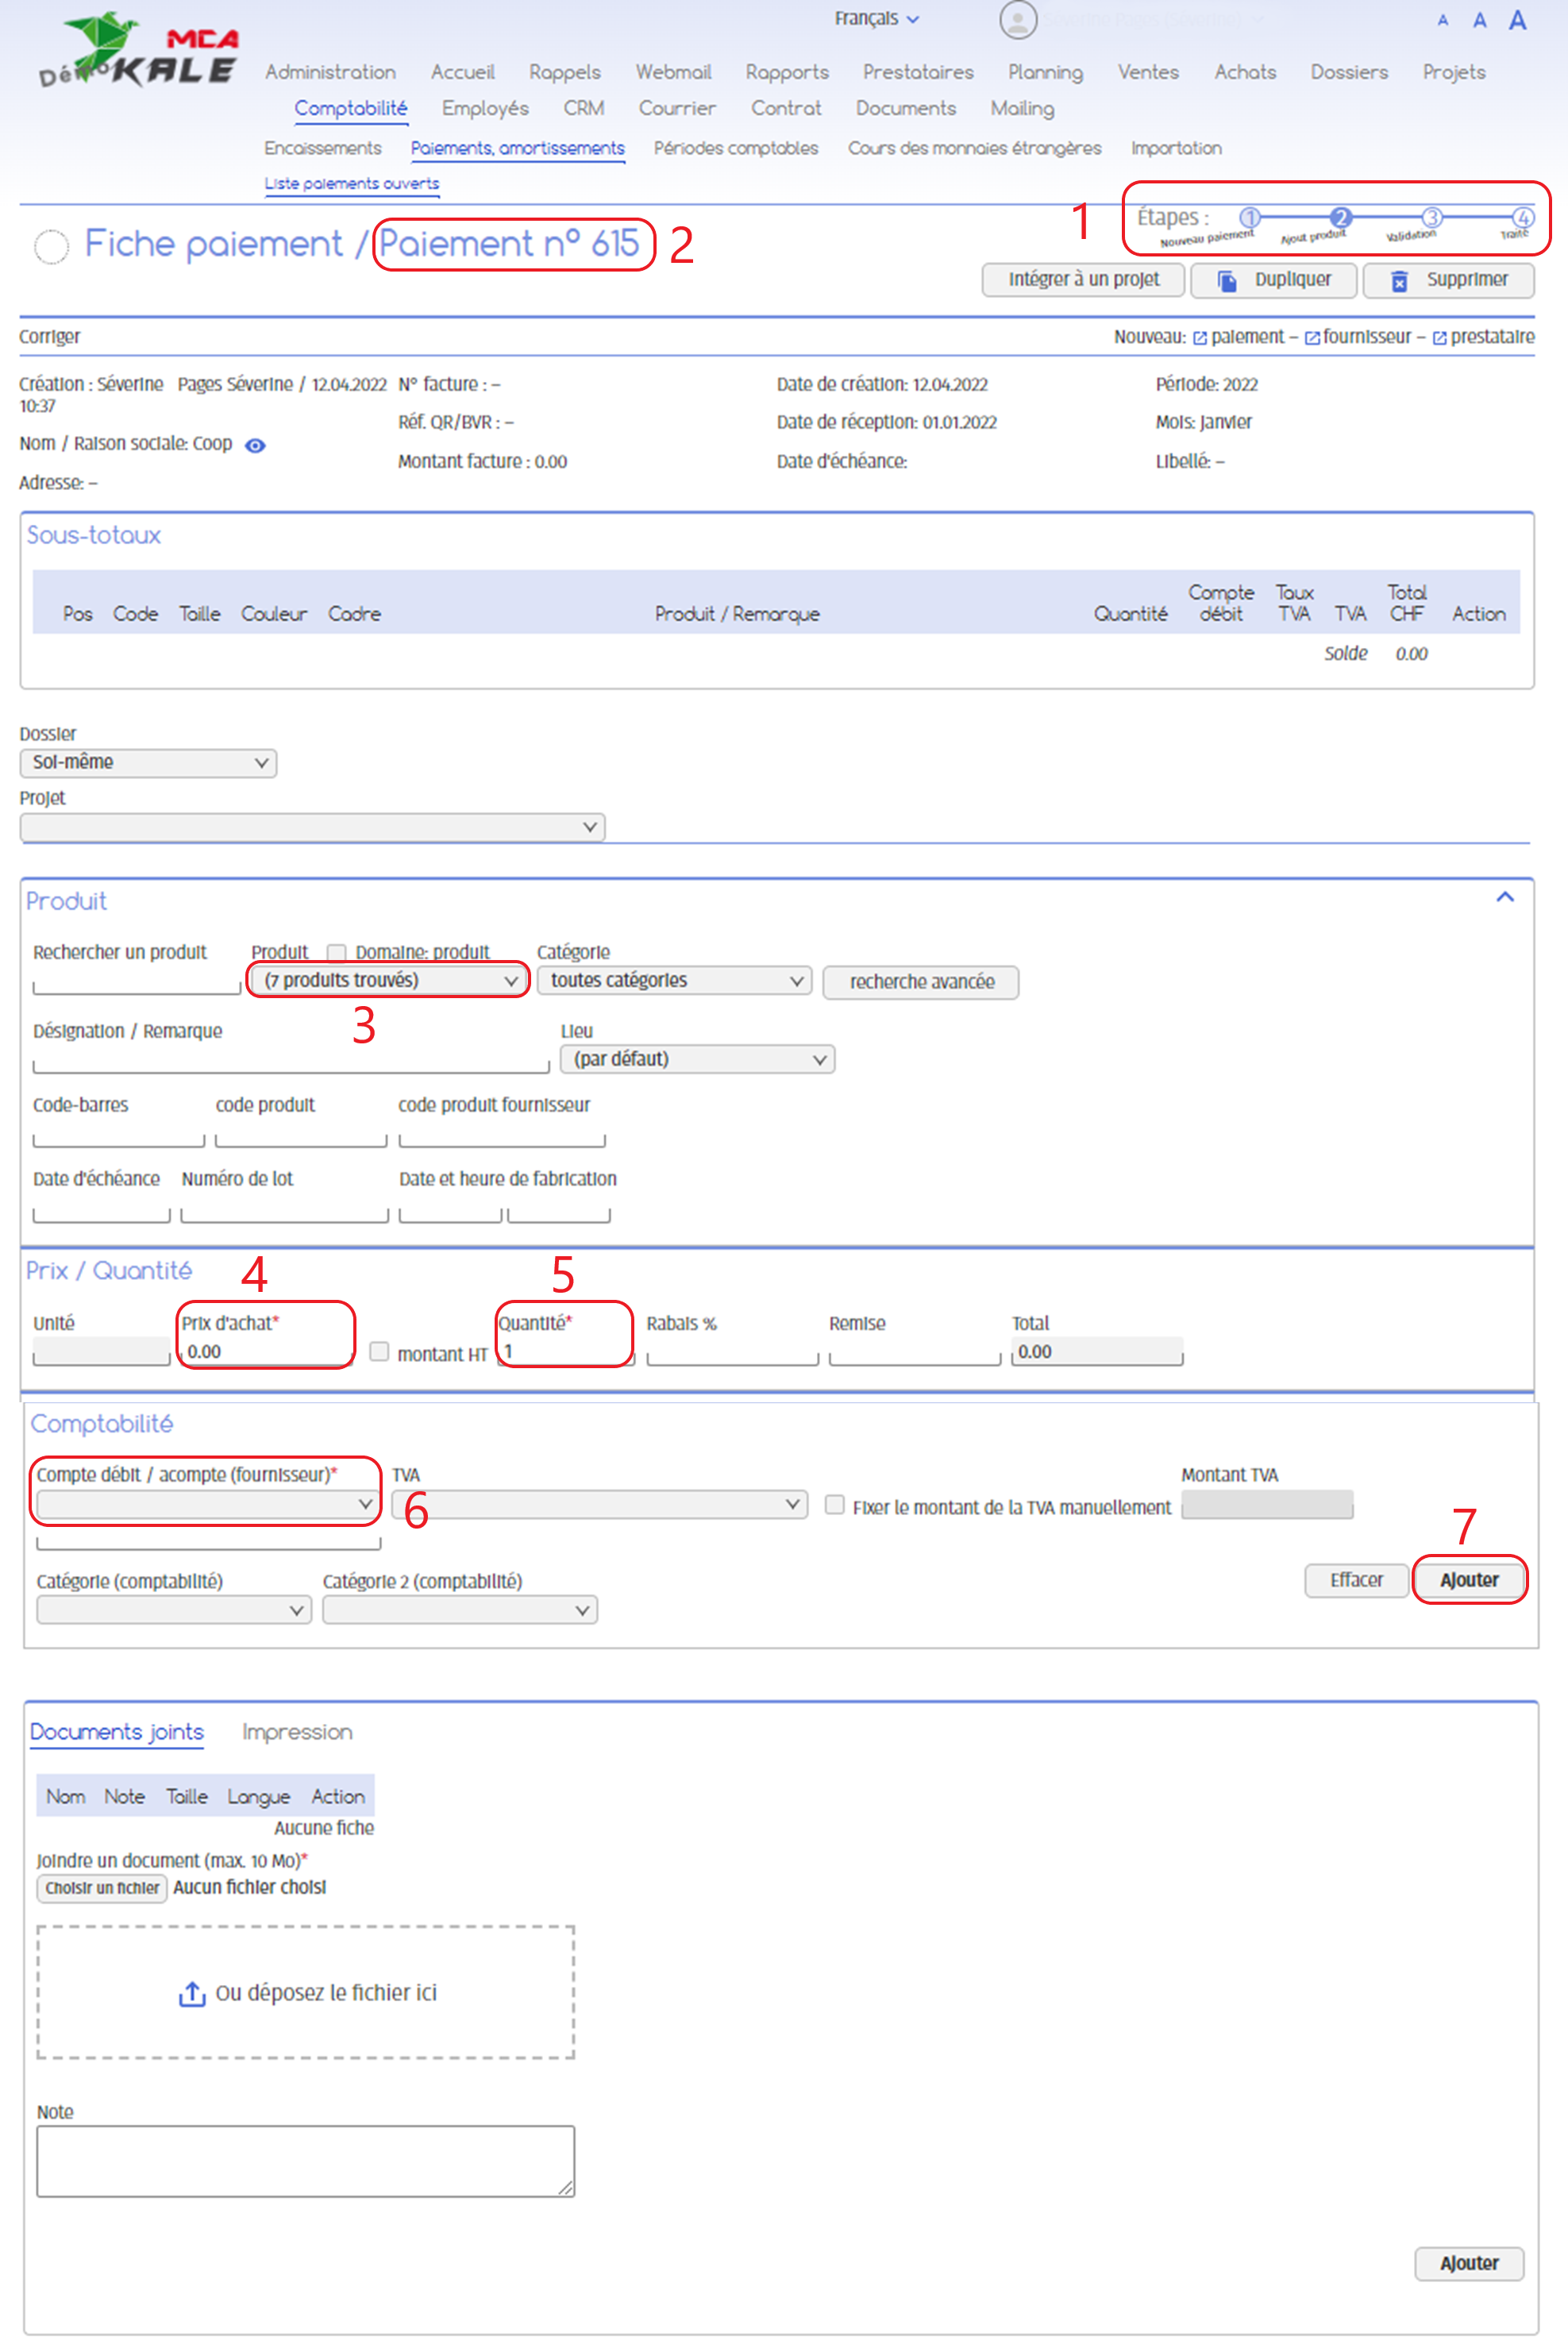
1. You are in step 2: Add product ;
2. Your payment is now automatically assigned a number. Here, our payment is number 615 ;
3. To add products to your invoice, select a product from the “Product” drop-down menu;
4. The prize will automatically be completed;
5. Add quantity purchased ;
6. The debit account will be completed automatically;
If the product does not appear in the drop-down menu, complete fields 4, 5 and 6 manually;
7. Click on Add to add the product;

8. Added products appear here;
Repeat all steps to add other products.
9. When you have added all the products, click on “Validate” to move on to step 3.
1.3. Step 3: Validation
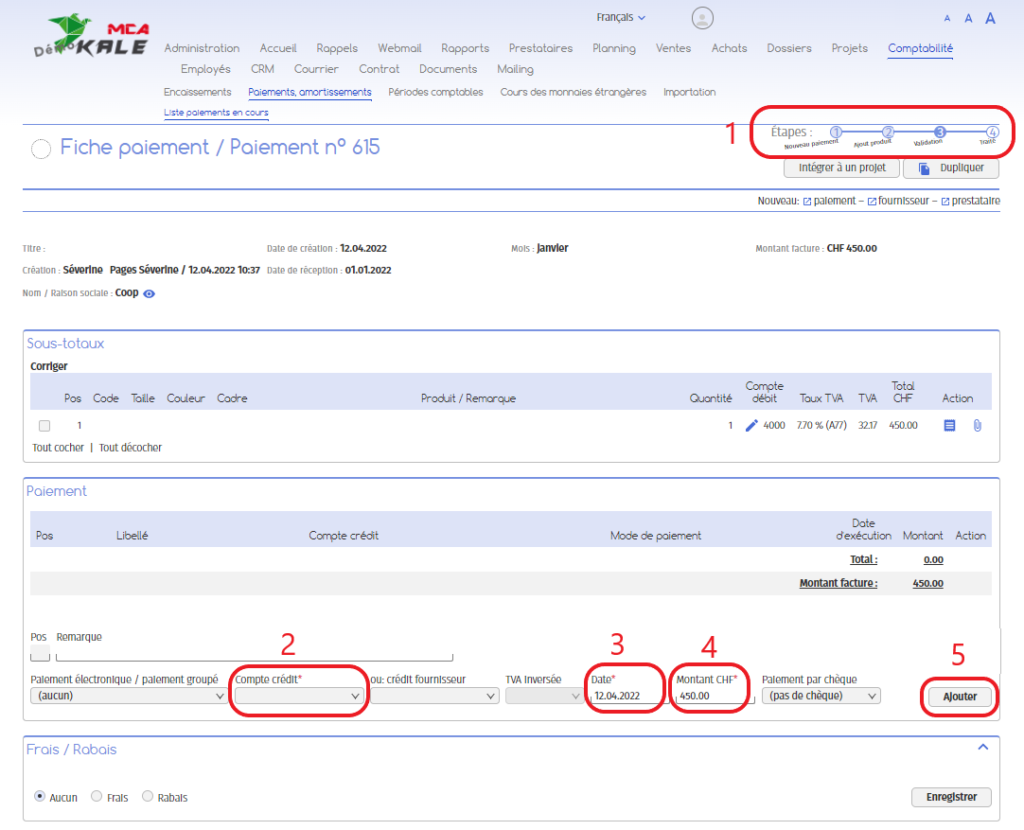
1. You have now reached step 3, which consists of adding a credit account to indicate the payment method;
2. Add the credit account (i.e. payment method) ;
3. Add the amount paid by this means on this date;
4. The prize will automatically be completed;
5. Click on “Add”;
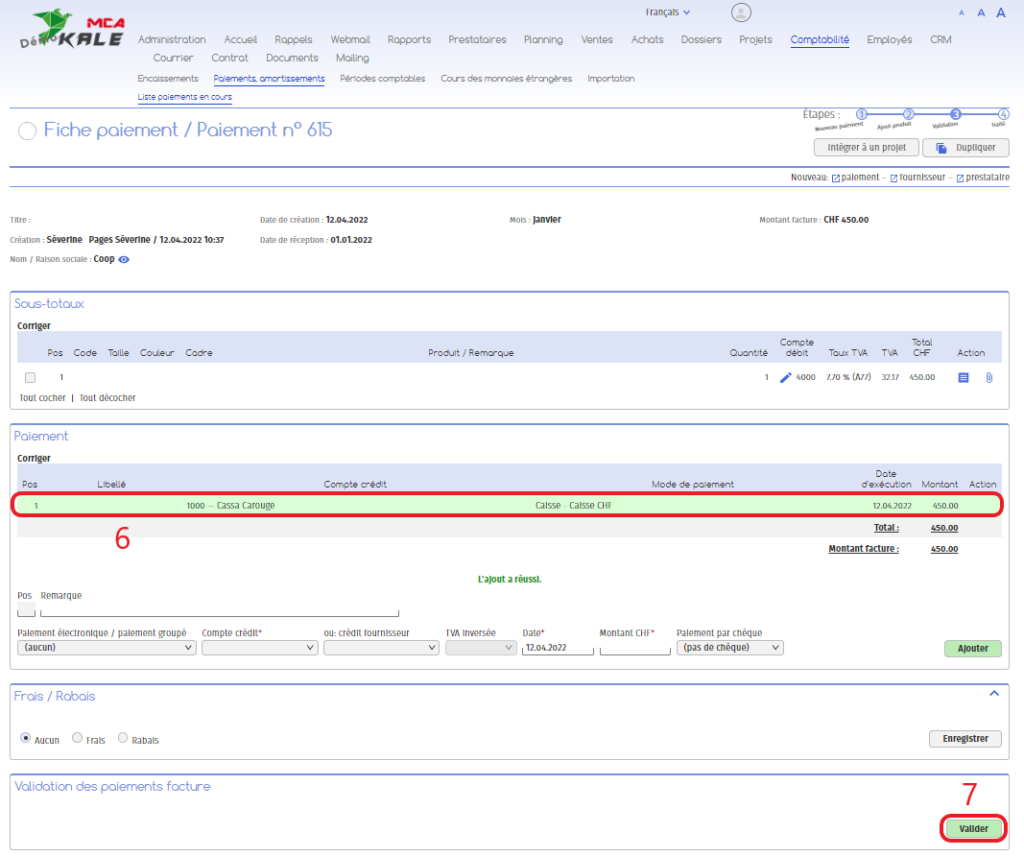
6. The added payment methods appear here;
Repeat all steps to add other payment methods.
7. When you have added all your payment methods, click on “Validate” to proceed to step 4.
1.4. 4th step: processing
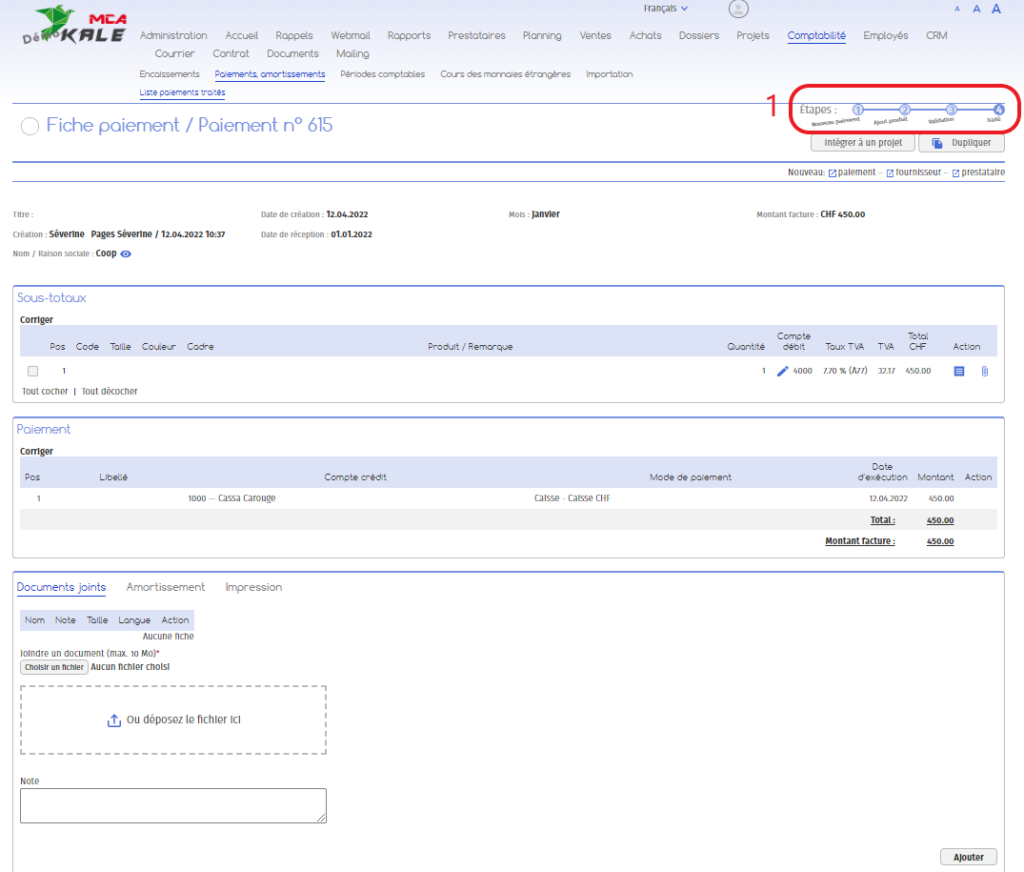
1. You have now reached step 4, your payment has been finalized and saved, and you can leave the page.