Create a credit note (debtor or creditor)
Table of contents
This chapter explains how to create a credit note in the software. On the whole, the procedure is the same for a customer or supplier credit note. The only differences are the menus to be accessed and the debit and credit accounts to be associated with the note.
1. Create a new credit note
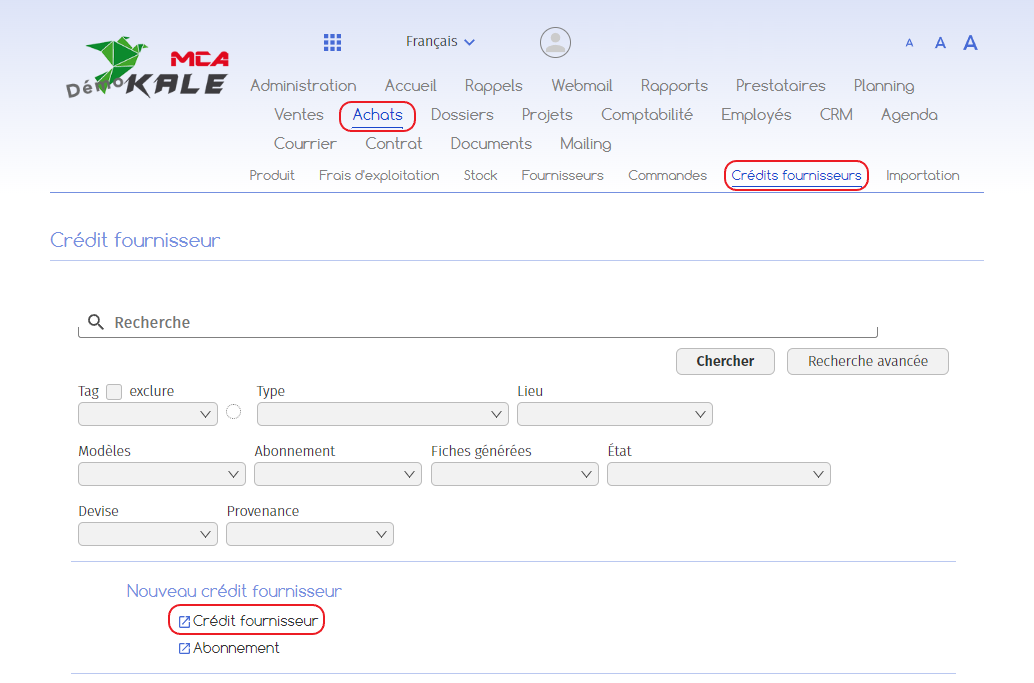
To create a supplier credit note, go to the “Purchasing” menu, then “Supplier credit”. Under “New supplier credit”, click on “Supplier credit”.
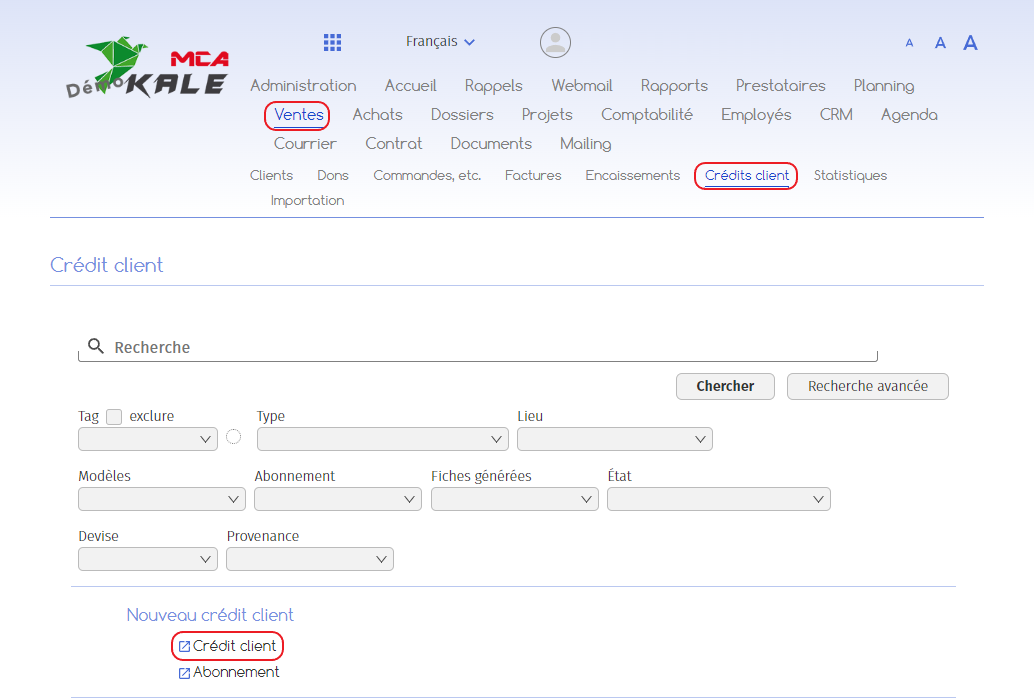
To create a customer credit note, go to the “Sales” menu, then “Customer credits”. Under “New customer credit”, click on “Customer credit”.
The rest of this guide uses the example of a customer credit note, specifying where necessary the differences with supplier credit.
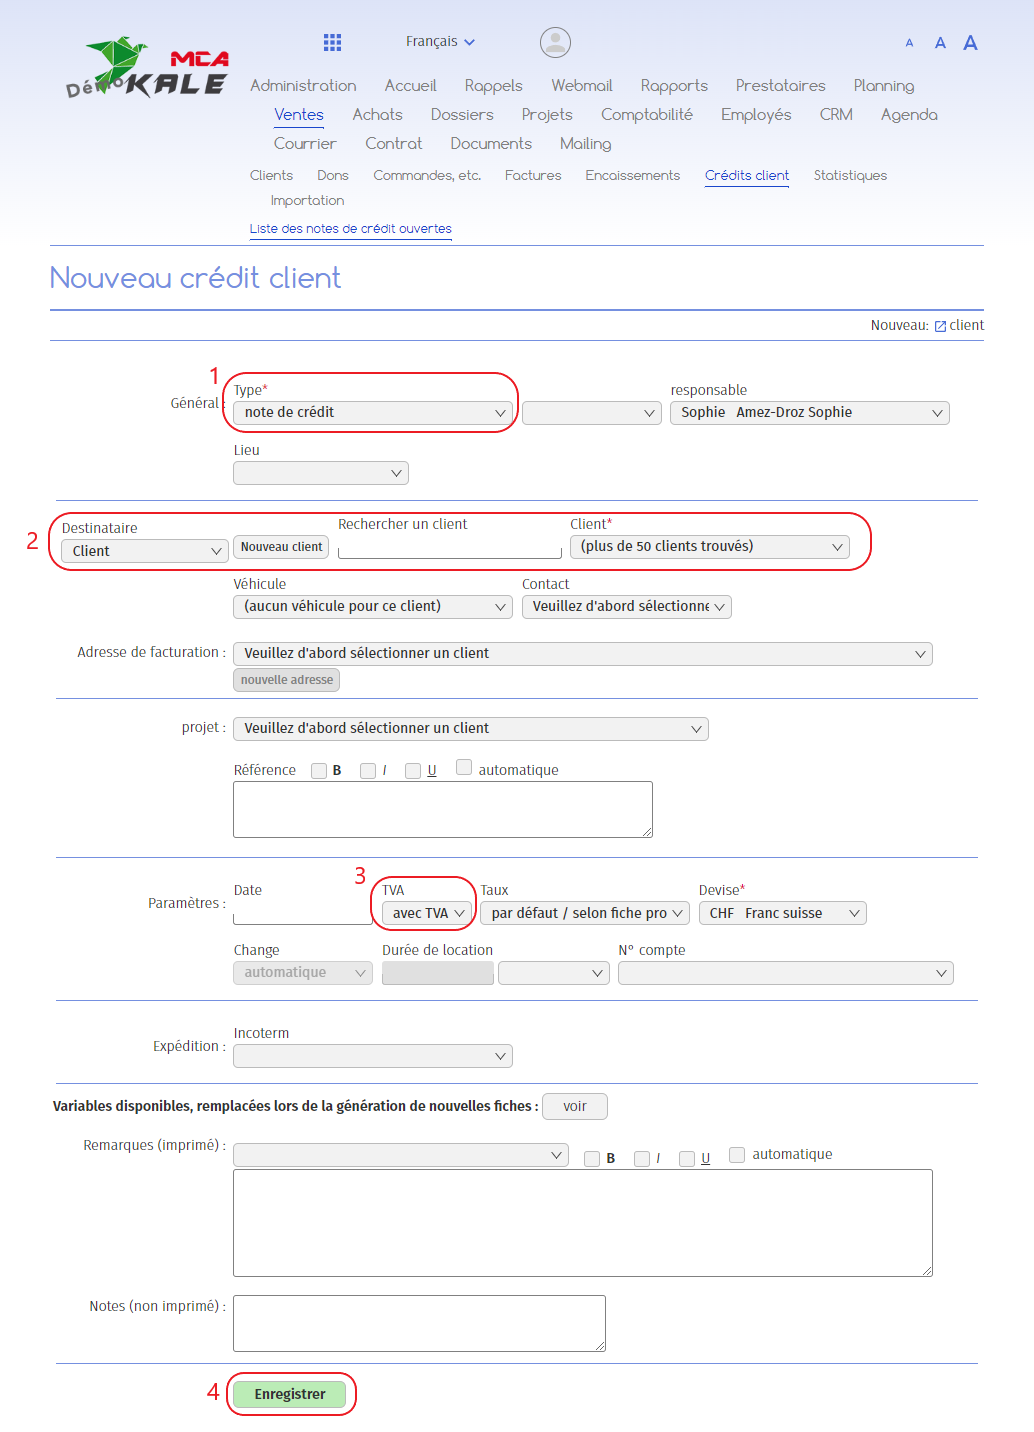
Below are the numbered explanations for each red frame in this image.
1. Select “Credit note”;
2. Select the customer concerned. In the case of a supplier credit note, select the supplier concerned here;
3. Specify whether the credit note includes VAT or not;
4. Click on “Save”.
2. Fill in the credit note
Once the credit note has been created, enter the following information:

1. Add a wording to the credit note (for example, “Cancel invoice n°XXXX”);
2. Add the amount of the bill ;
3. Specify the reverse VAT rate if your credit note includes VAT. This resets the VAT to zero, so you don’t have to pay tax on the amount ;
4. Click on “Add”.
3. Confirm credit note
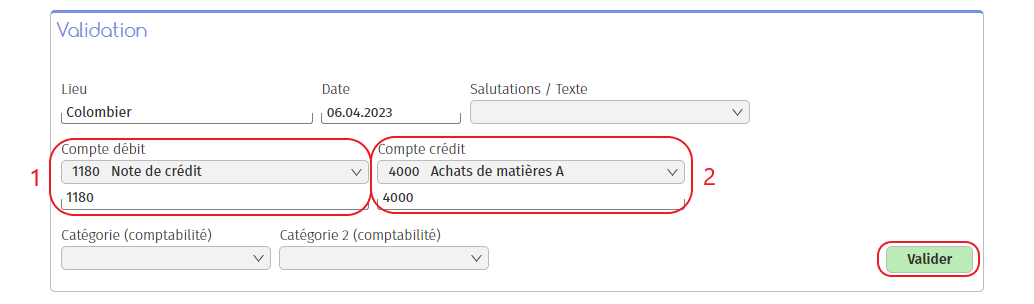
Once the amount has been added, the “Validation” tab appears below.
In the case of a customer credit note :

1. Choose a debit account. According to your chart of accounts, this will be the “3900 Discount” account;
2. Choose a credit account. According to your chart of accounts, this will be the “2010 Customer credit note” account;
3. Click on “Validate”.
In the case of a supplier credit note :
1. Choose a debit account. According to your chart of accounts, this will be account “1180 Credit note”;
2. Choose a credit account. According to your chart of accounts, this will be the “4000 Purchases of A materials” account;
3. Click on “Validate”.
Your credit note has now been created.