Print a chart of accounts
This chapter explains how to print a chart of accounts.
1. Access the chart of accounts
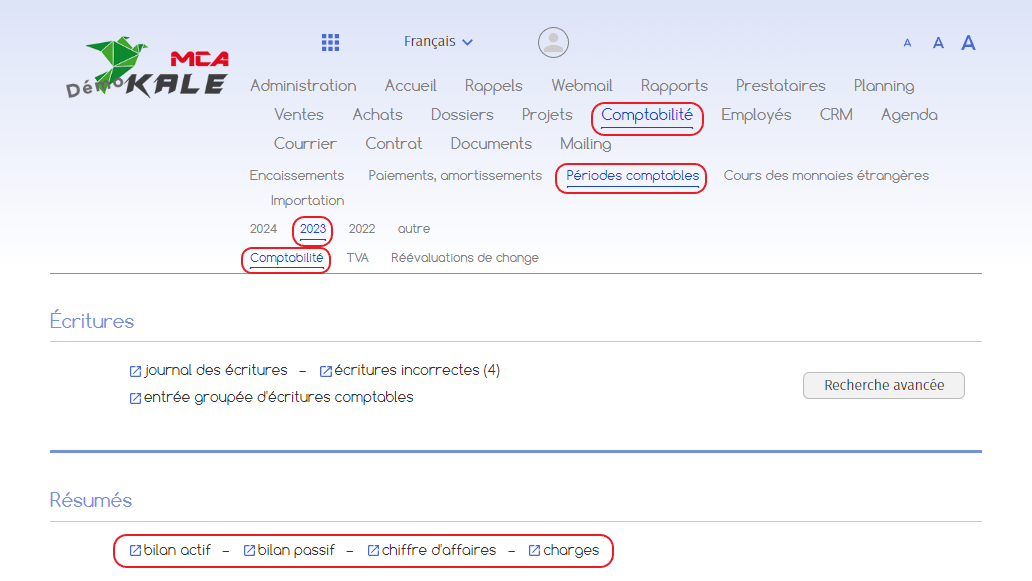
Go to “Accounting”, then “Accounting periods”, then “Current year”, then “Accounting”.
In the “Summaries” section, click on “Balance sheet assets” or one of the other links. The link chosen is not important for the next step.
2. Select information
To print your chart of accounts, you need to generate a PDF. Before that, you can choose the different elements that will appear on the PDF.
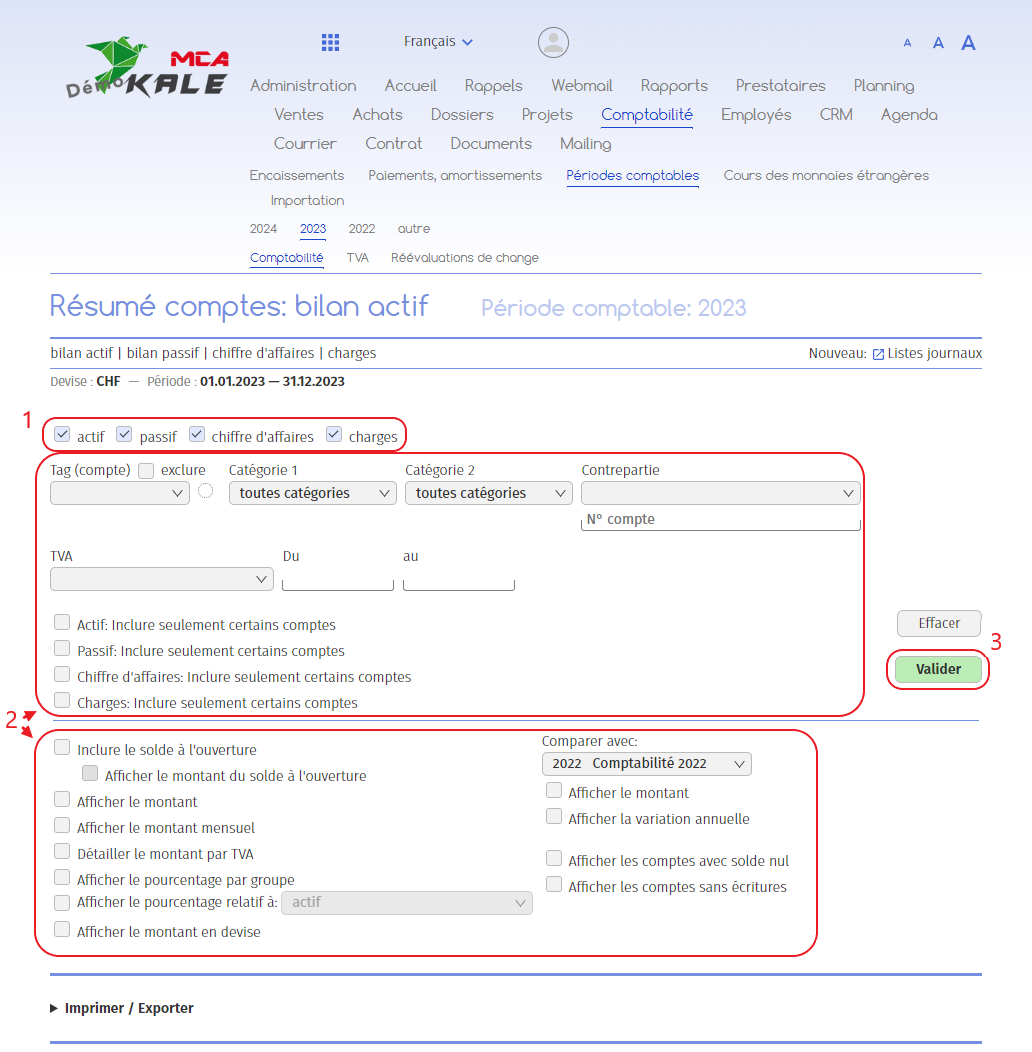
Below are the numbered explanations for each red frame in this image.
1. Select the assets, liabilities, sales and/or expenses according to the accounts you wish to include;
2. Select the items to be included in the PDF from the options provided. If, for example, you want to print only the accounts and their labels, uncheck all the boxes linked to the amount, as in the image above. If you tick one of the “XXX: include only certain accounts” options, you can choose which groups of accounts to include or exclude;
3. Click on the “Confirm” button to confirm your selection.
3. Generate a PDF for printing
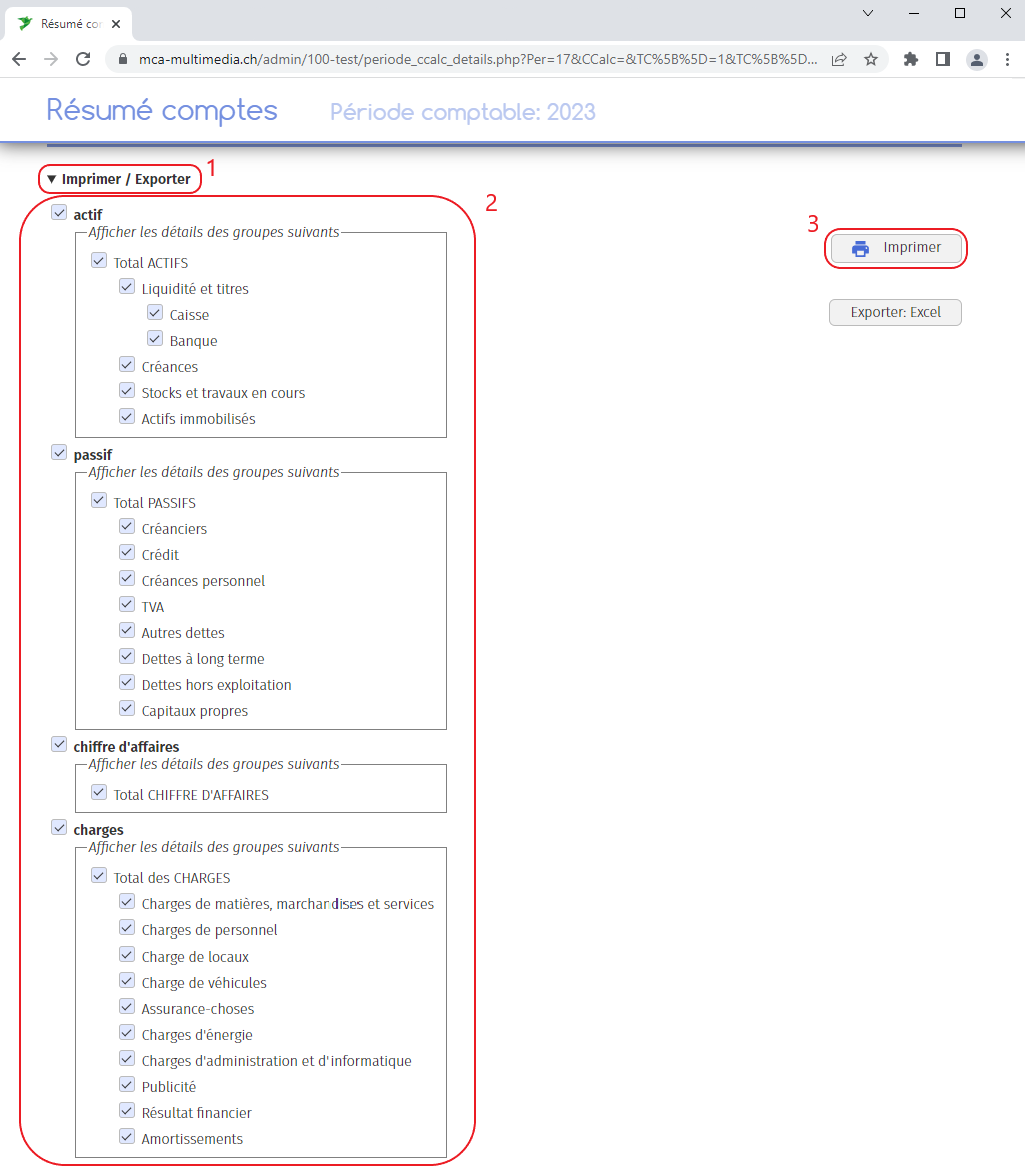
Below are the numbered explanations for each red frame in this image.
1. Click on “Print / Export”;
2. Here you can also decide which account groups to include in the printout. Select the items you want;
3. Click on “Print”.
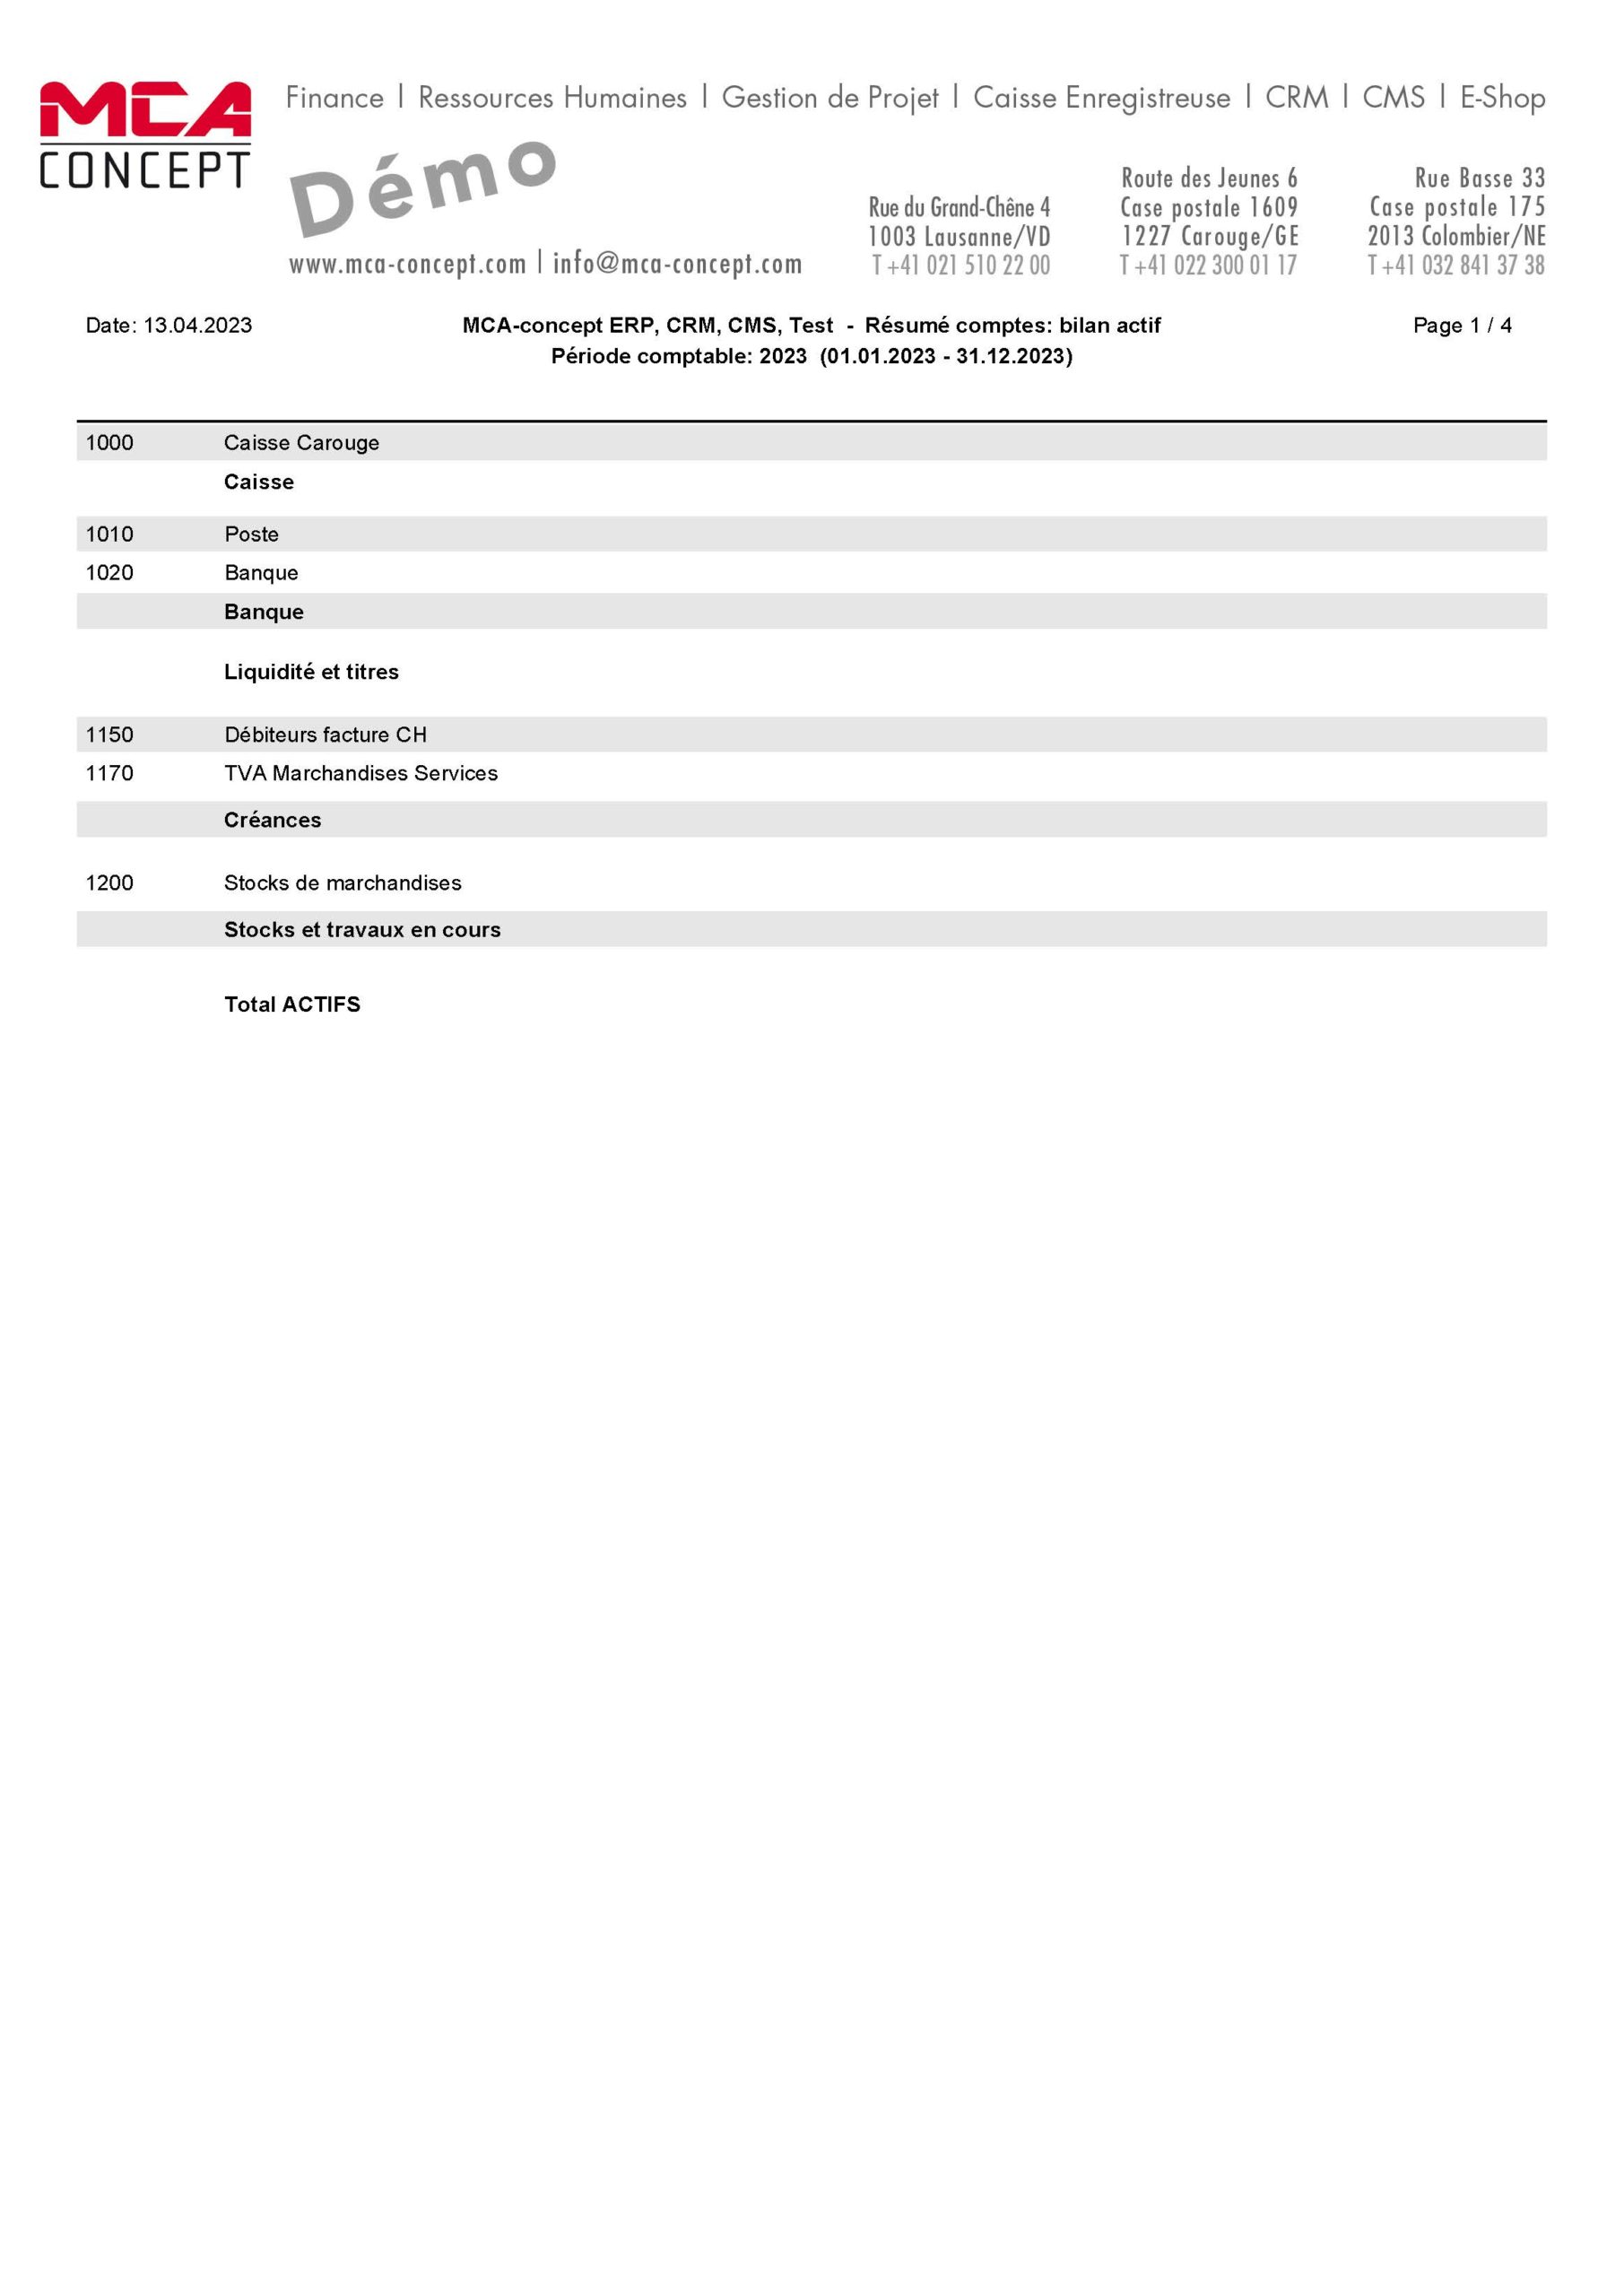
The software will generate a PDF of your chart of accounts, which you can download or print out. Below is an example of this document: