Create a delivery note
This guide explains how to create a delivery note.
1. Create a delivery note
Within the software, a delivery note is created from an order form or a quotation.
1.1. Creating the delivery note
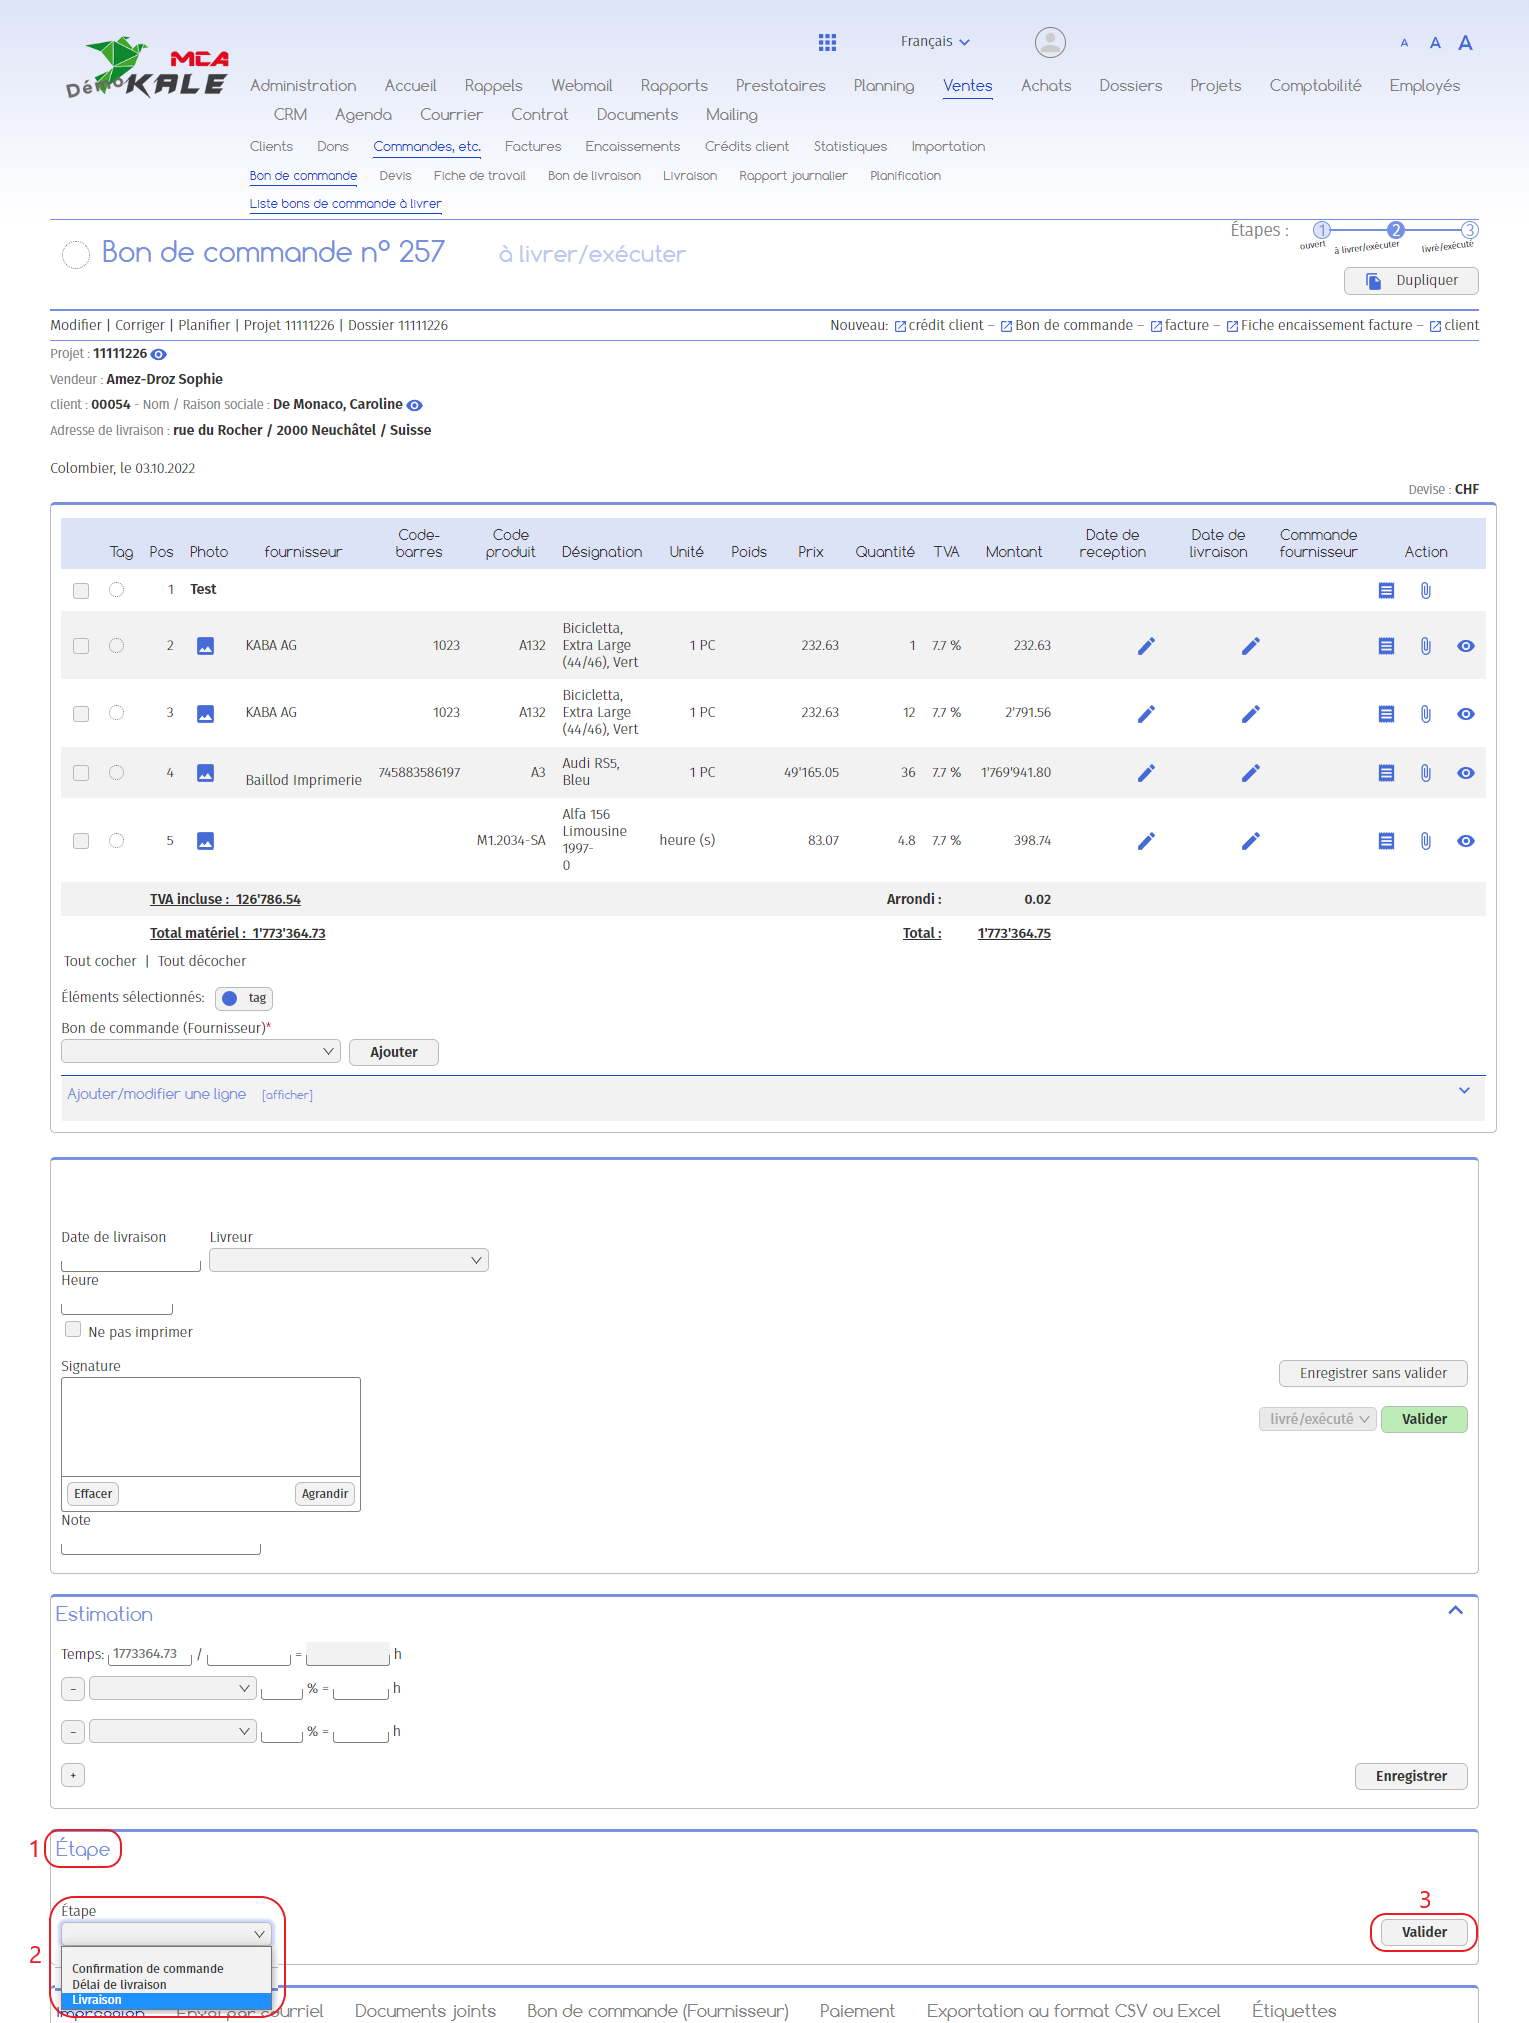
Below are the numbered explanations for each red frame in this image.
1. Go to the “Stage” tab;
2. Choose the “Delivery” step;
3. Click on “Validate”.
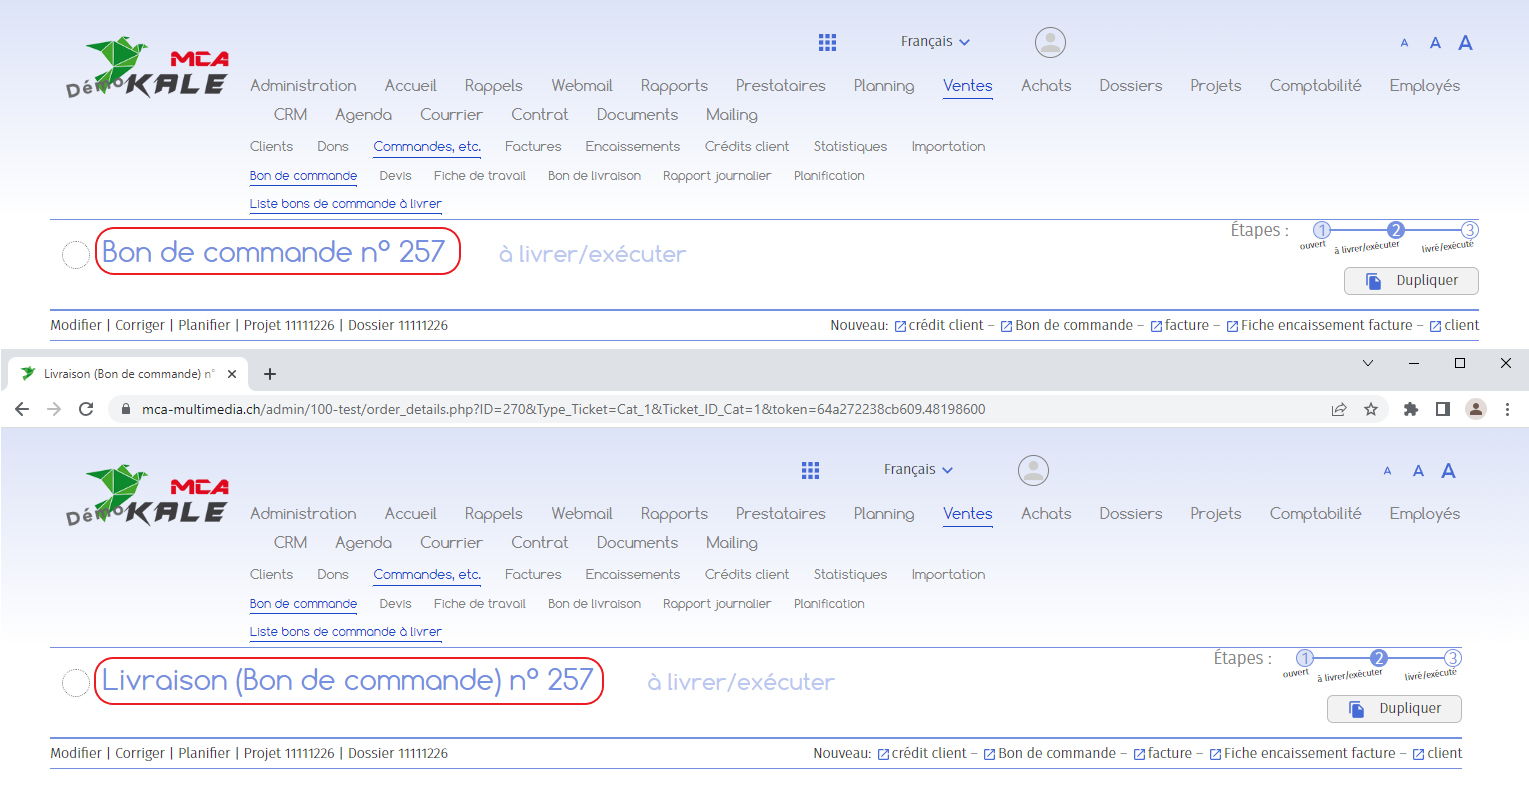
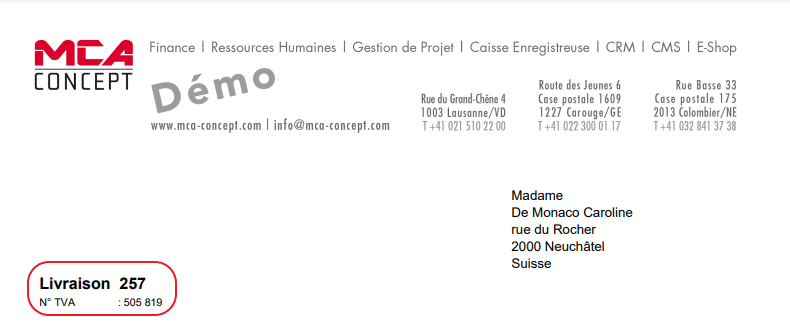
Following this action, the name of the document will be changed, but it will retain the same number to ensure that the information can be traced.
2. Send the delivery note
The software gives you 2 options for signing the delivery note:
- – Print the delivery note so that the driver can have it signed by the customer on delivery
– Access the voucher in the software via a tablet to sign the document electronically
2.1. Paper delivery note
Additional documents can be attached to the delivery note in the software. This allows you to link the paper delivery note signed in electronic form to the delivery note stored in the database.
2.1.1. Signature
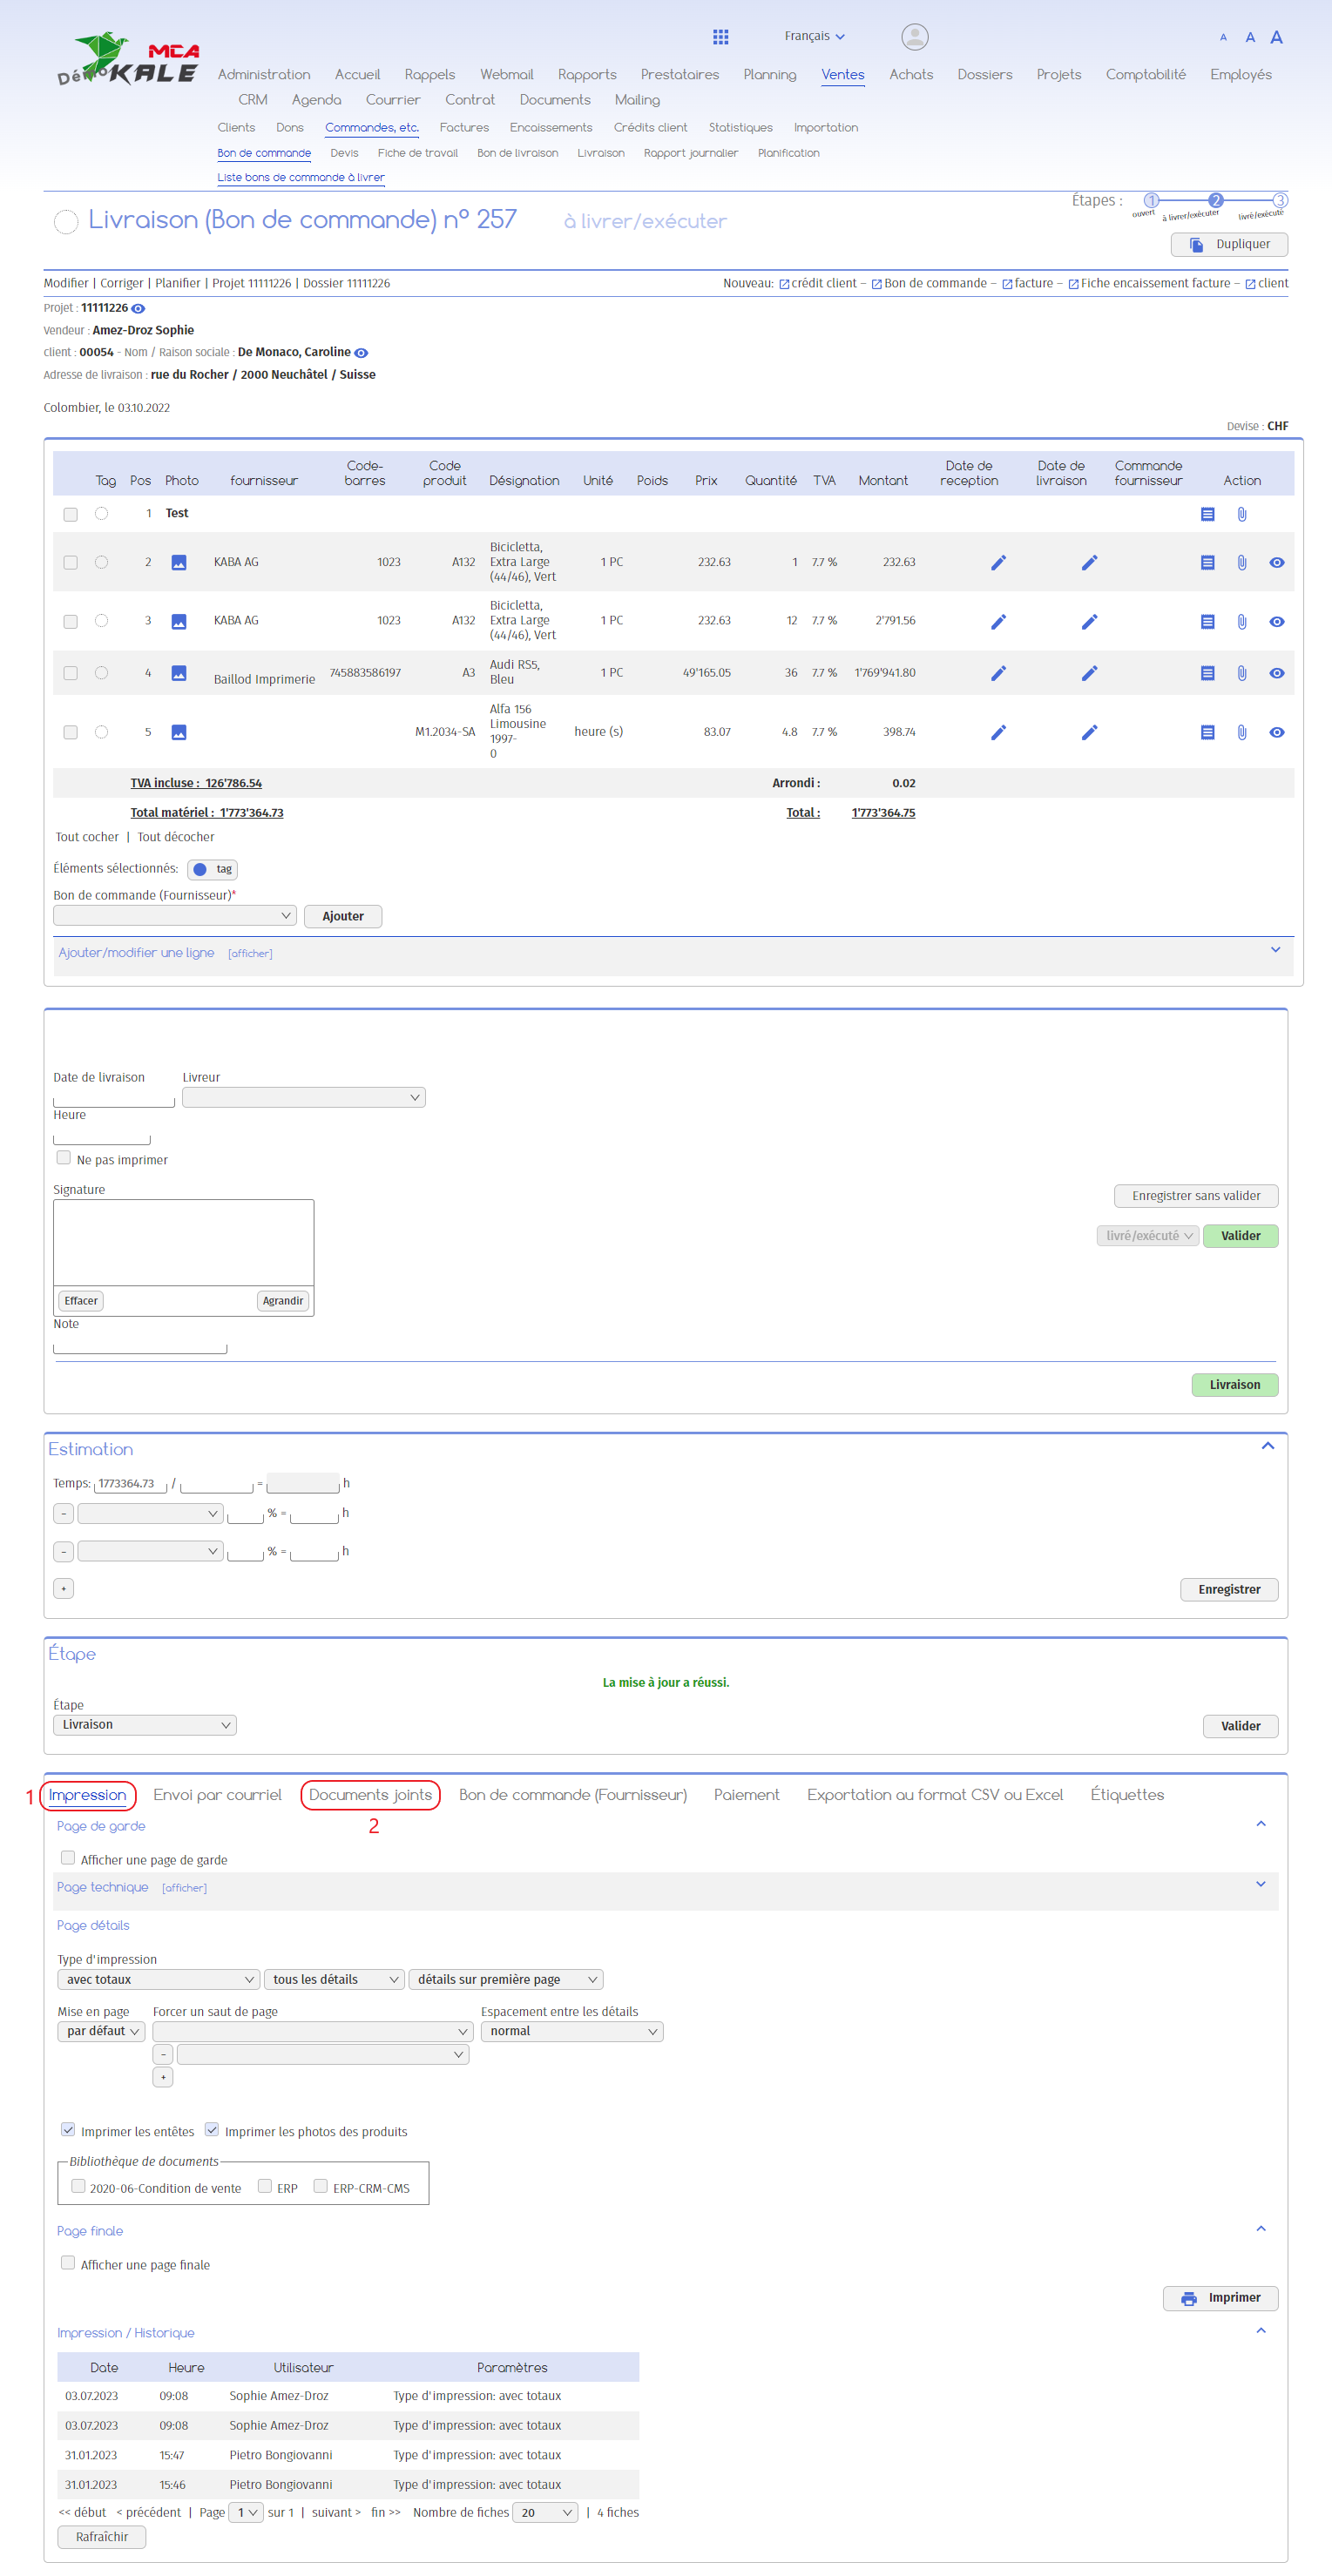
1. In the “Print” tab, choose the print settings and then click the “Print” button to generate the PDF voucher. You can then print the document.
Once the document has been signed by the customer, you can scan it and attach it to the delivery note recorded in the software as follows:
2. Under the “Attached documents” tab, place the delivery note signed by the customer in the dedicated field, add a note linked to the document if necessary, then click on the “Add” button.
2.1.1. Validation
When all the goods have been delivered, you can validate the delivery note to change the order status to “delivered/executed”.
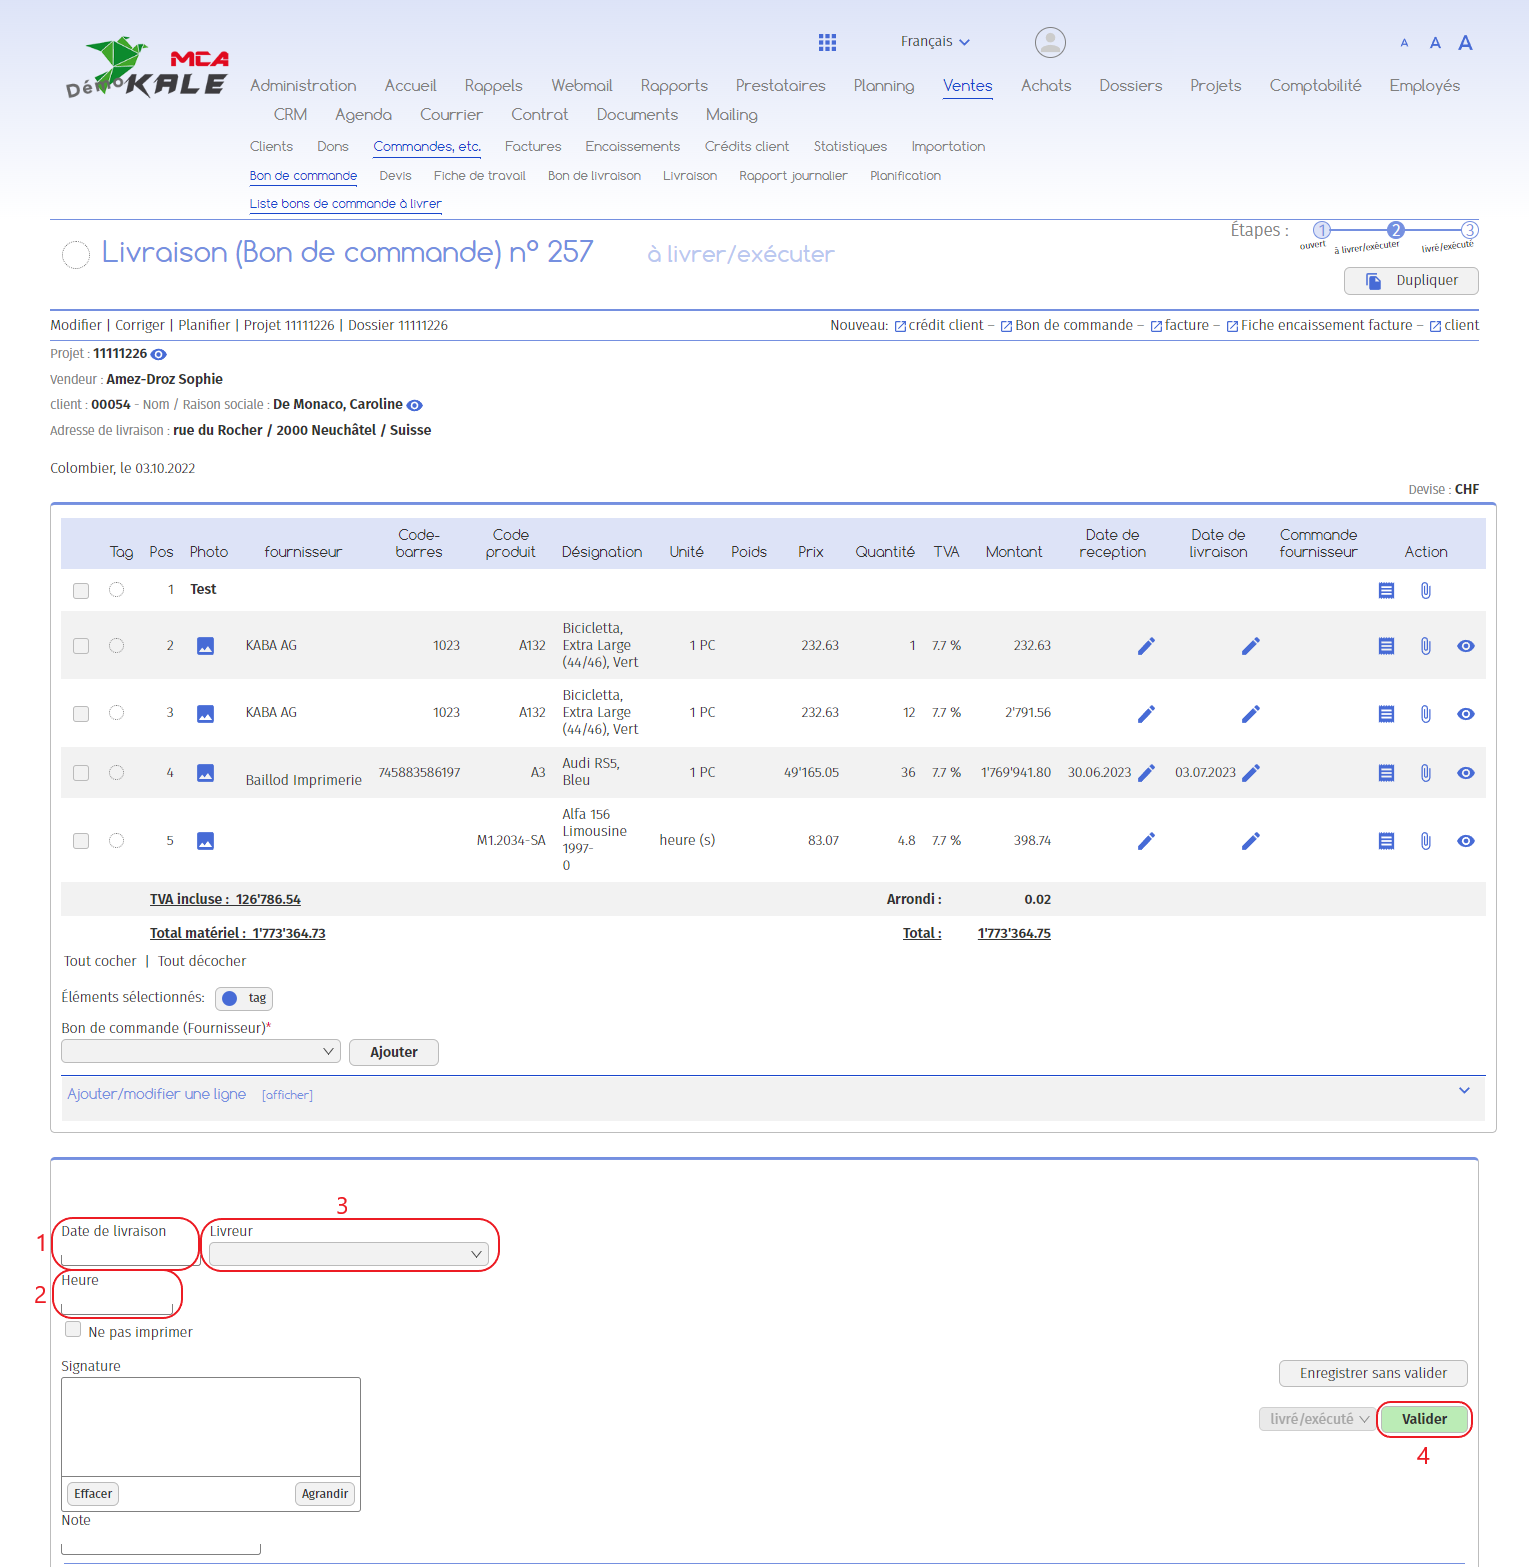
1. Add the delivery date ;
2. Add the delivery time ;
3. Specify who delivered the goods;
4. Click on “Confirm” to confirm that the delivery has been made.
2.2. Digital delivery note
To sign the delivery note electronically, access the delivery note in the software from a tablet or other mobile device. The voucher can be signed and validated in the same action.
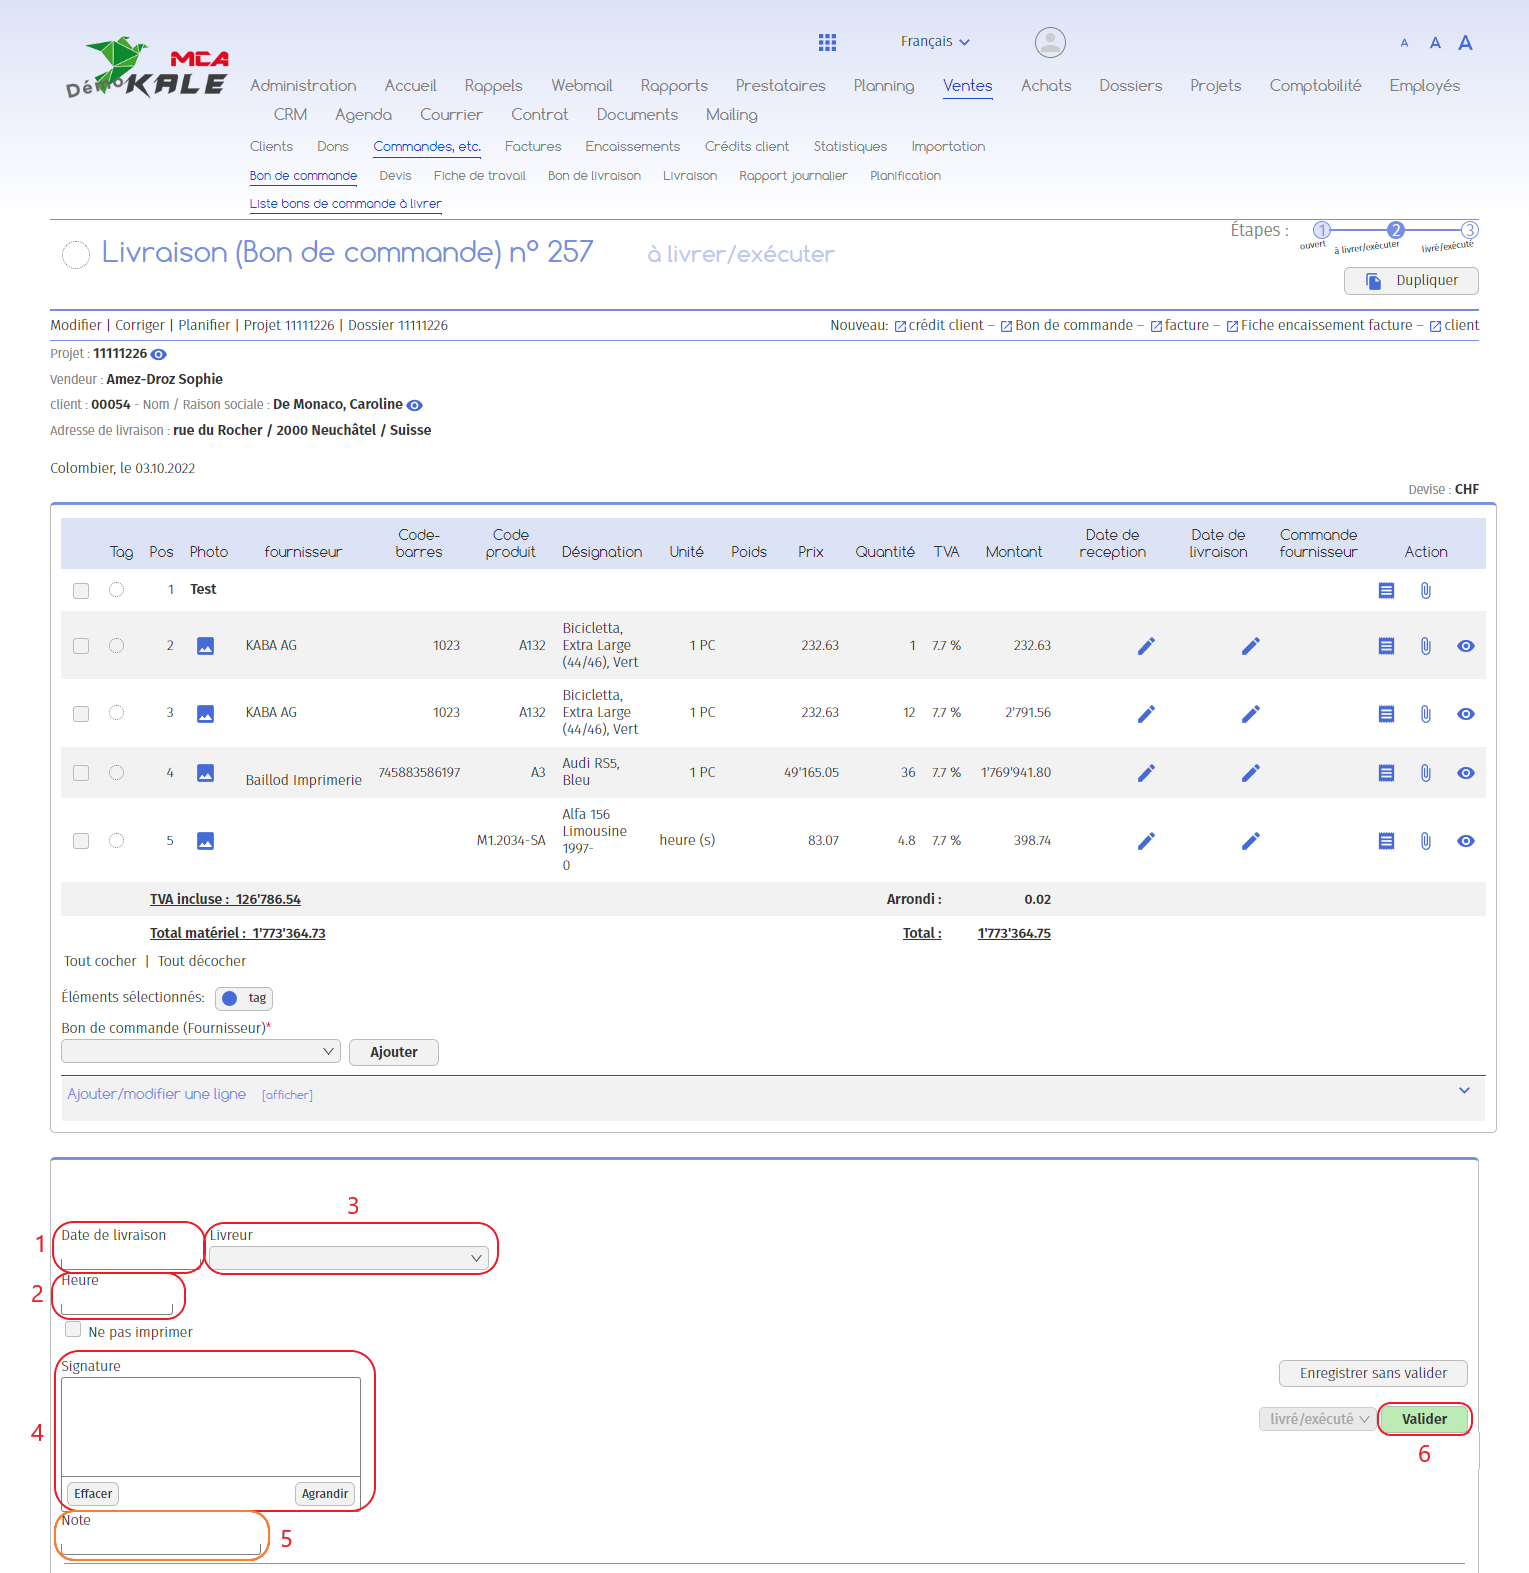
1. Add the delivery date ;
2. Add the delivery time ;
3. Specify who delivered the goods;
4. The customer signs in the field provided;
5. Optional: You can add remarks that will be linked to the softly;
6. Click on “Confirm” to confirm that the delivery has been made.
3. Partial delivery
If your delivery note contains several items and these are delivered on different dates, you can specify the date of receipt and the delivery date per product on the delivery note.
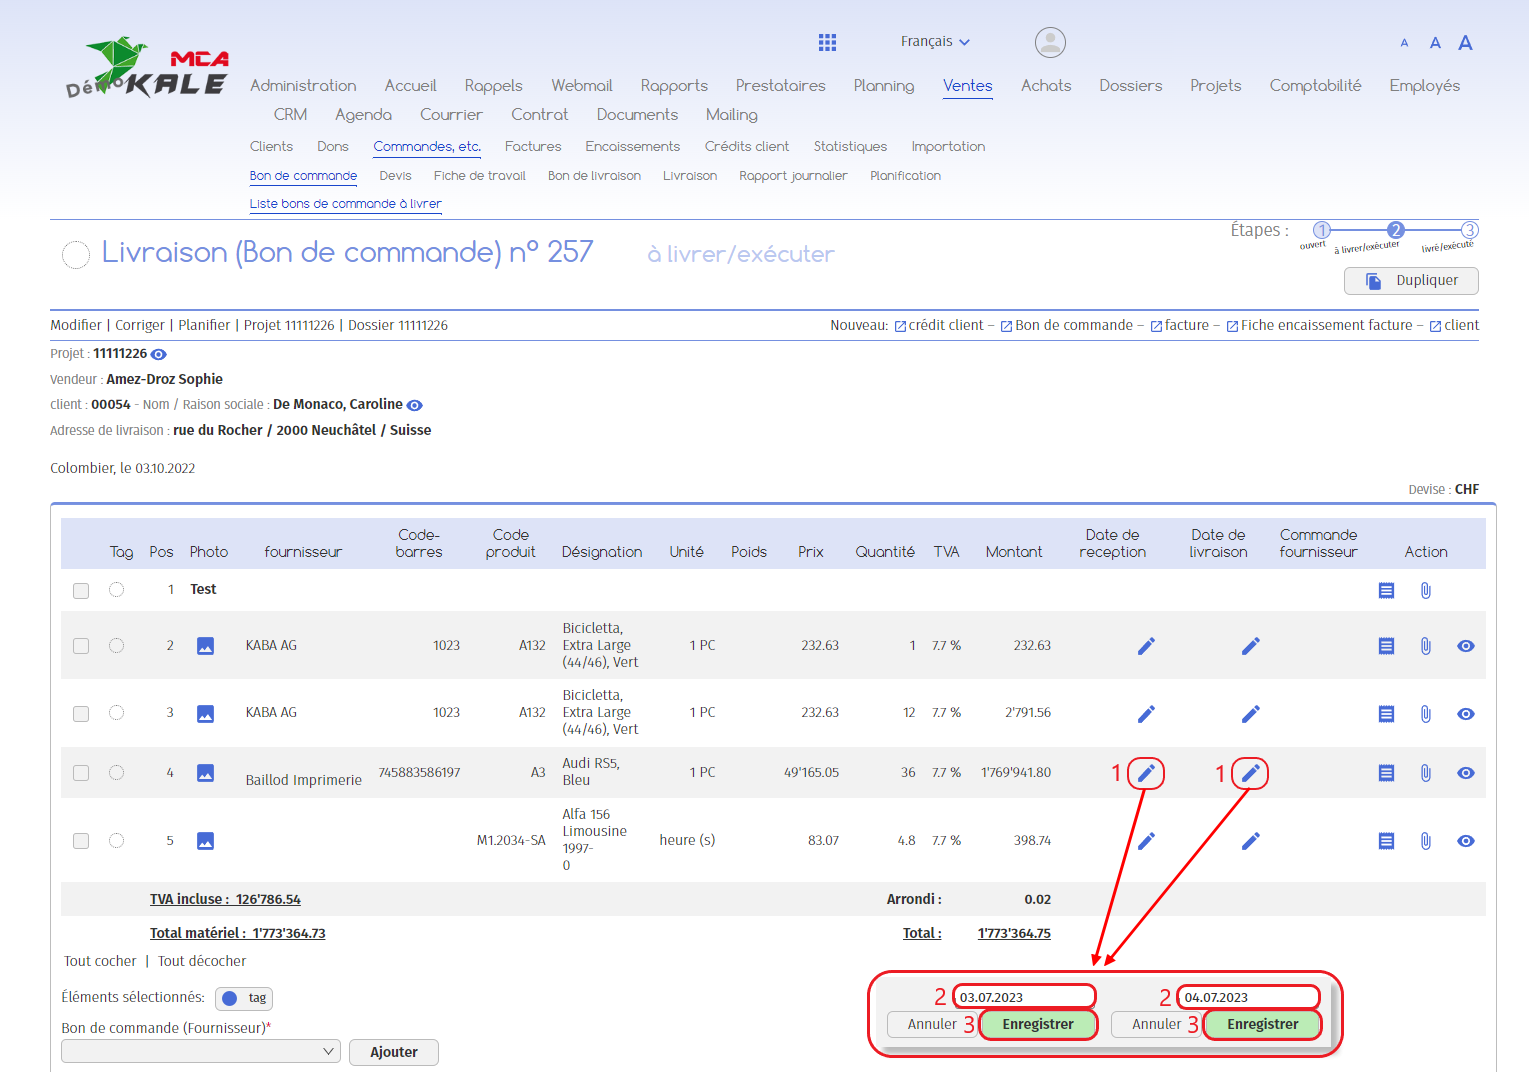
Whether it’s reception or delivery:
1. Click on the pen next to the product concerned;
2. Add the date ;
3. Click on “Save”.